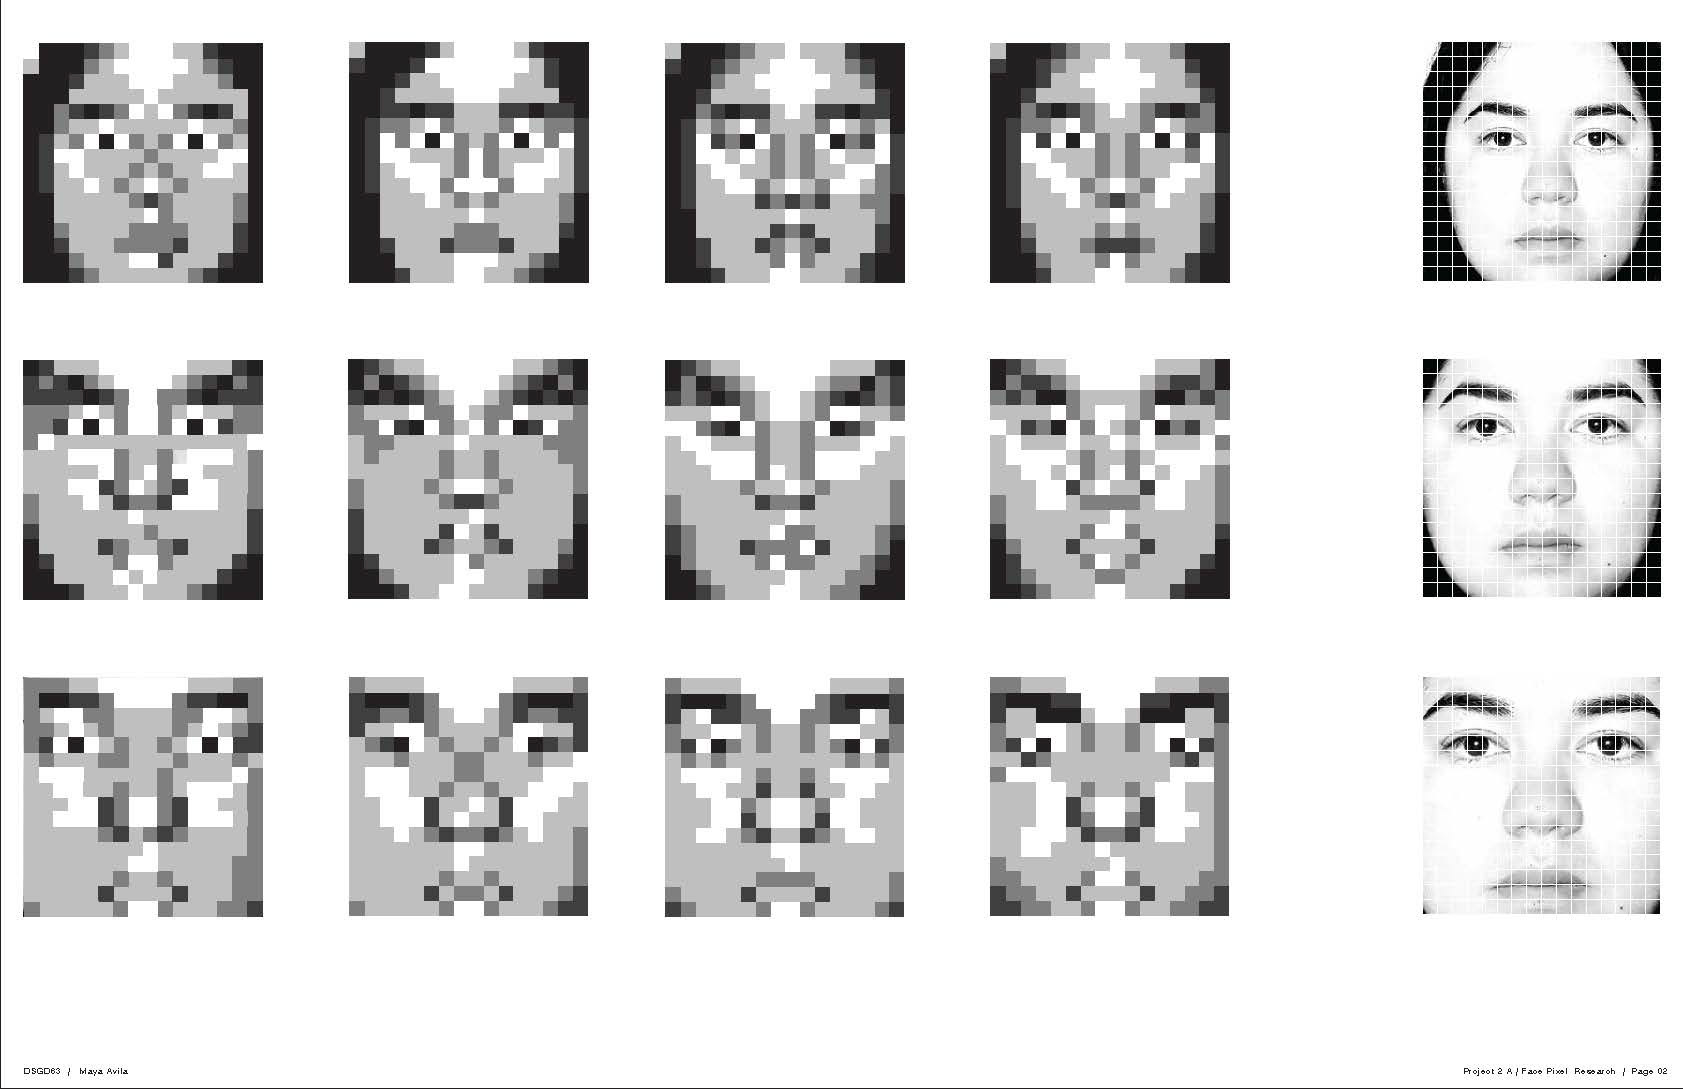
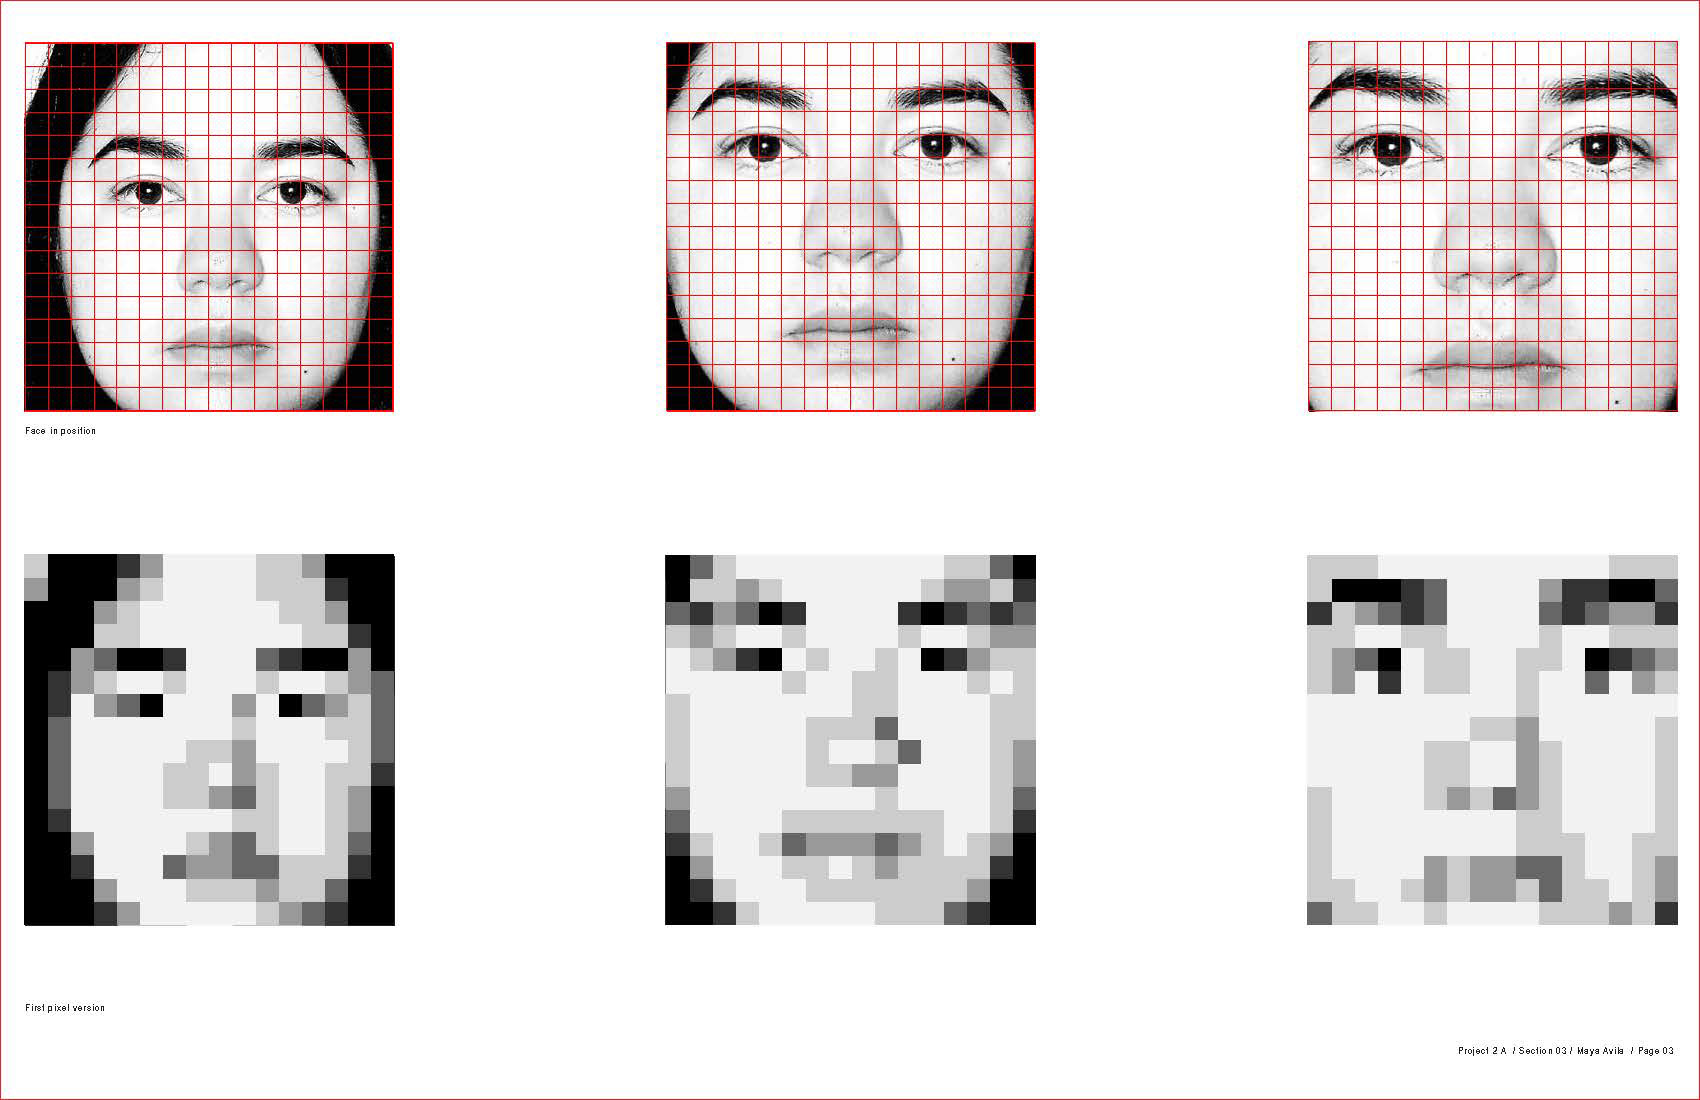
The first step was beginning with a self portrait photo and turning this photo black and white. Using the black and white photo, I placed my face in three different grid alignments. These grid alignments helped place the squares for the pixels. From each of these alignments, I created four different grayscale pixel versions.
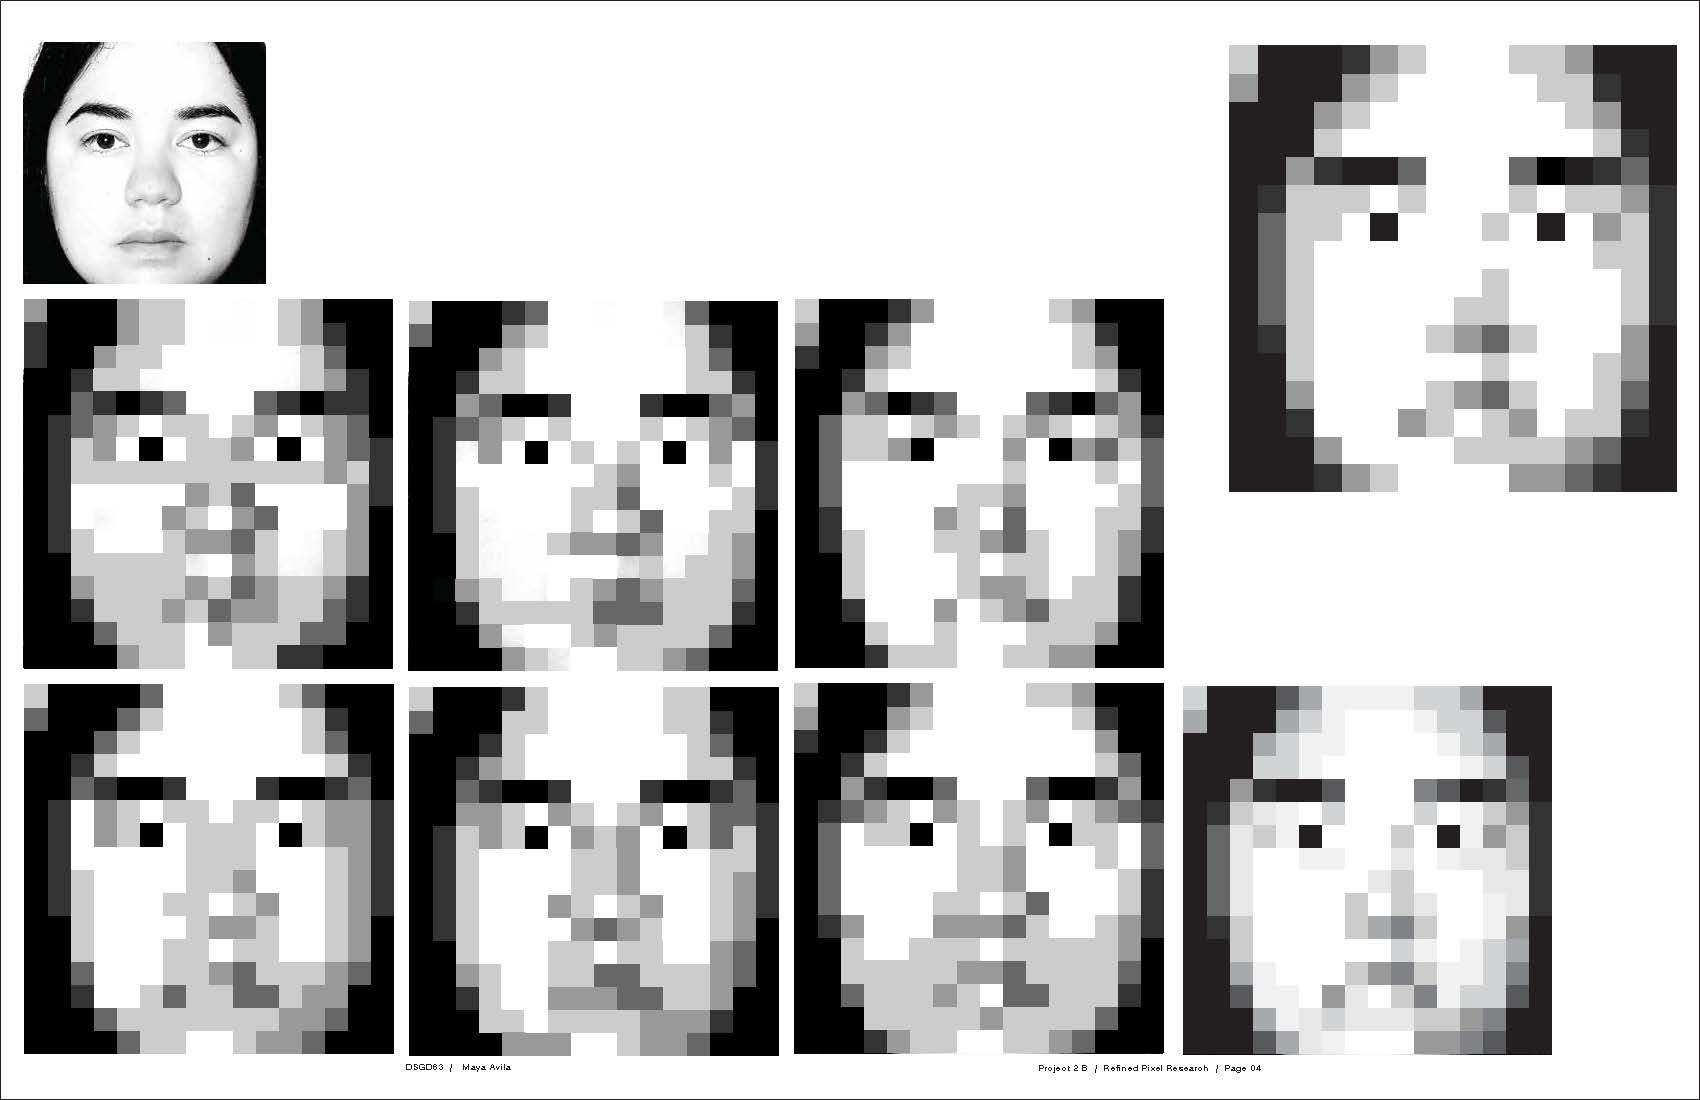
I redefined the placement of the grays to highlight the features of my face that make me recognizable. This step also required me to pick a placement of my face that I was happy with to continue on with the rest of the project.
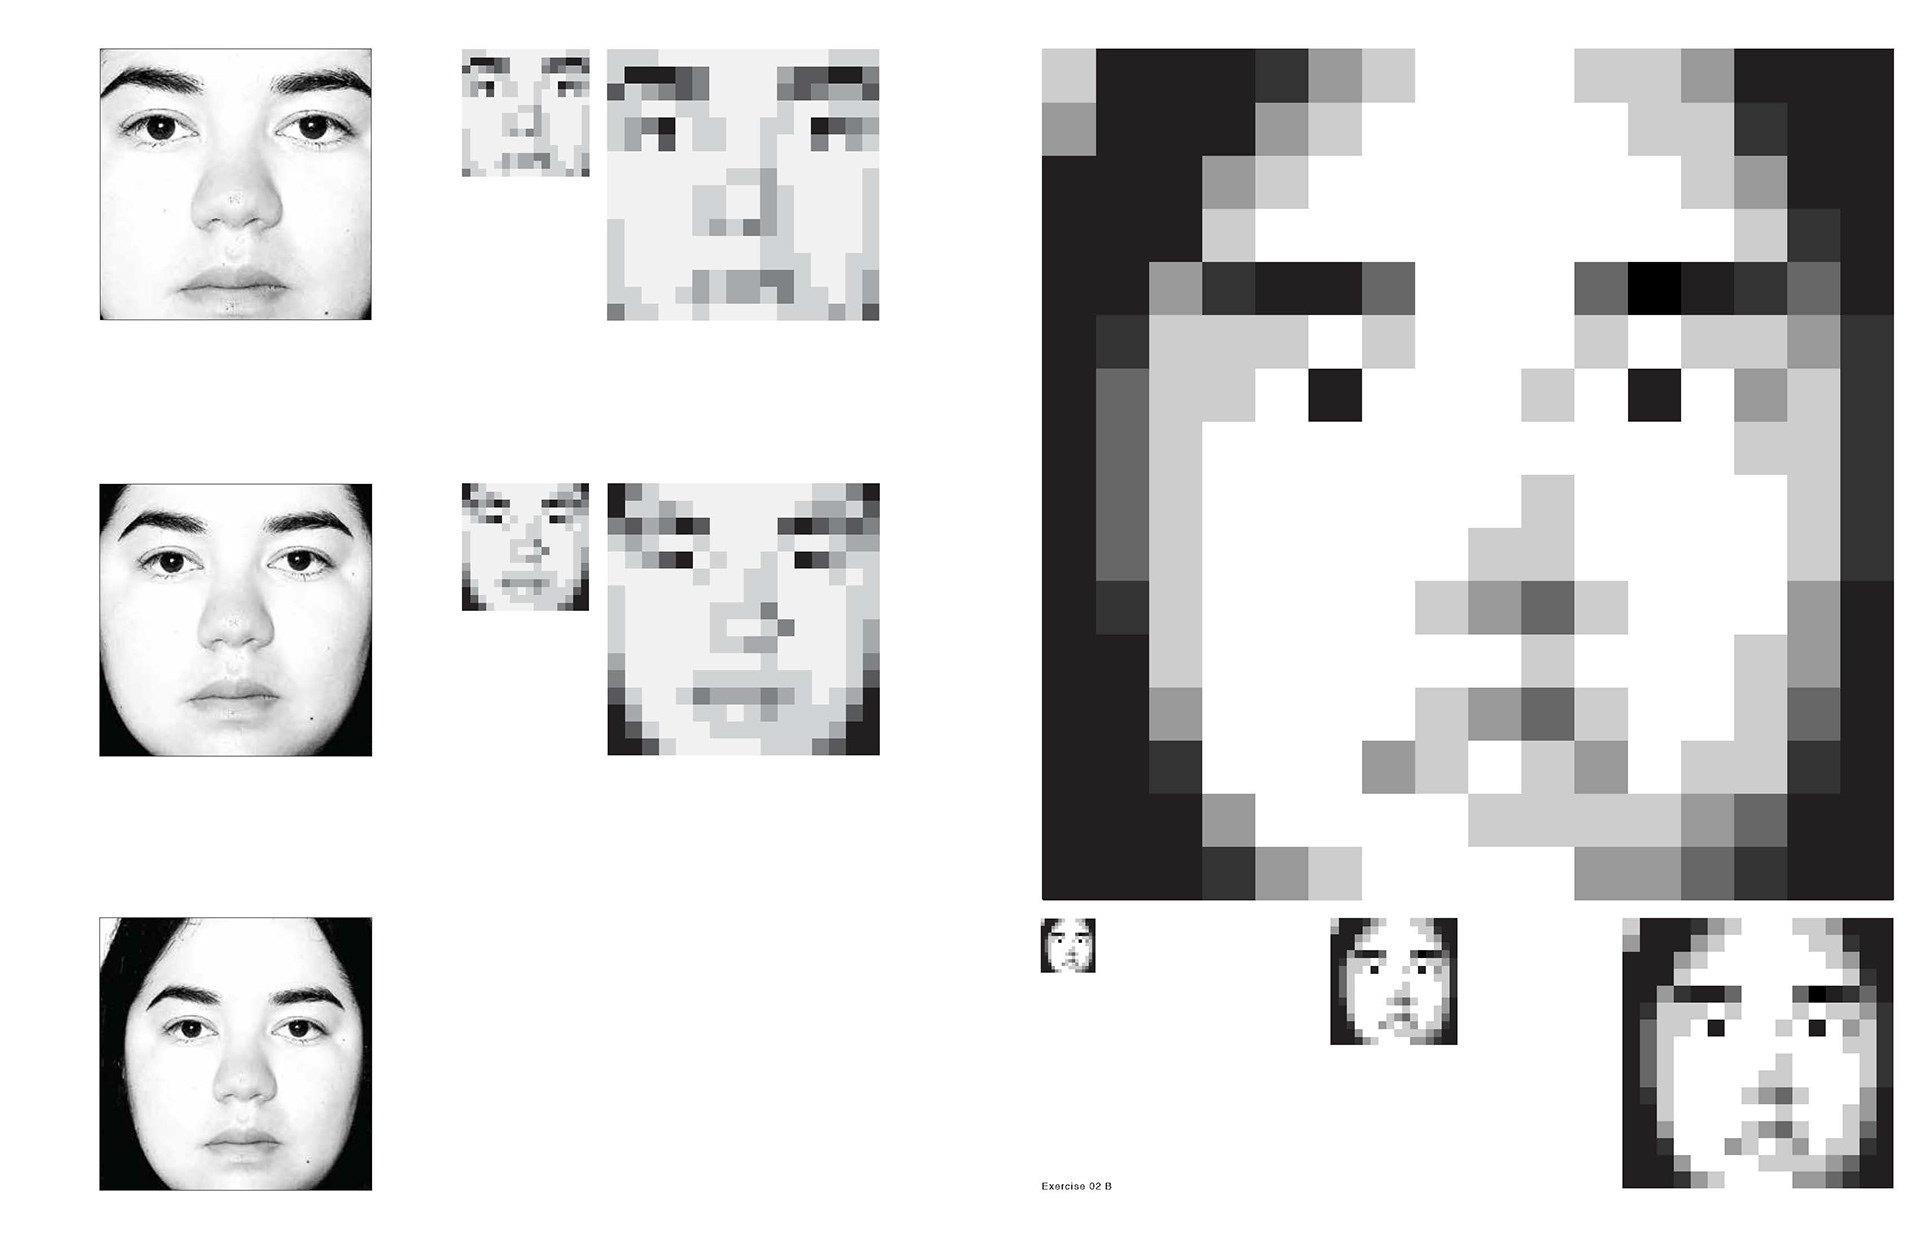
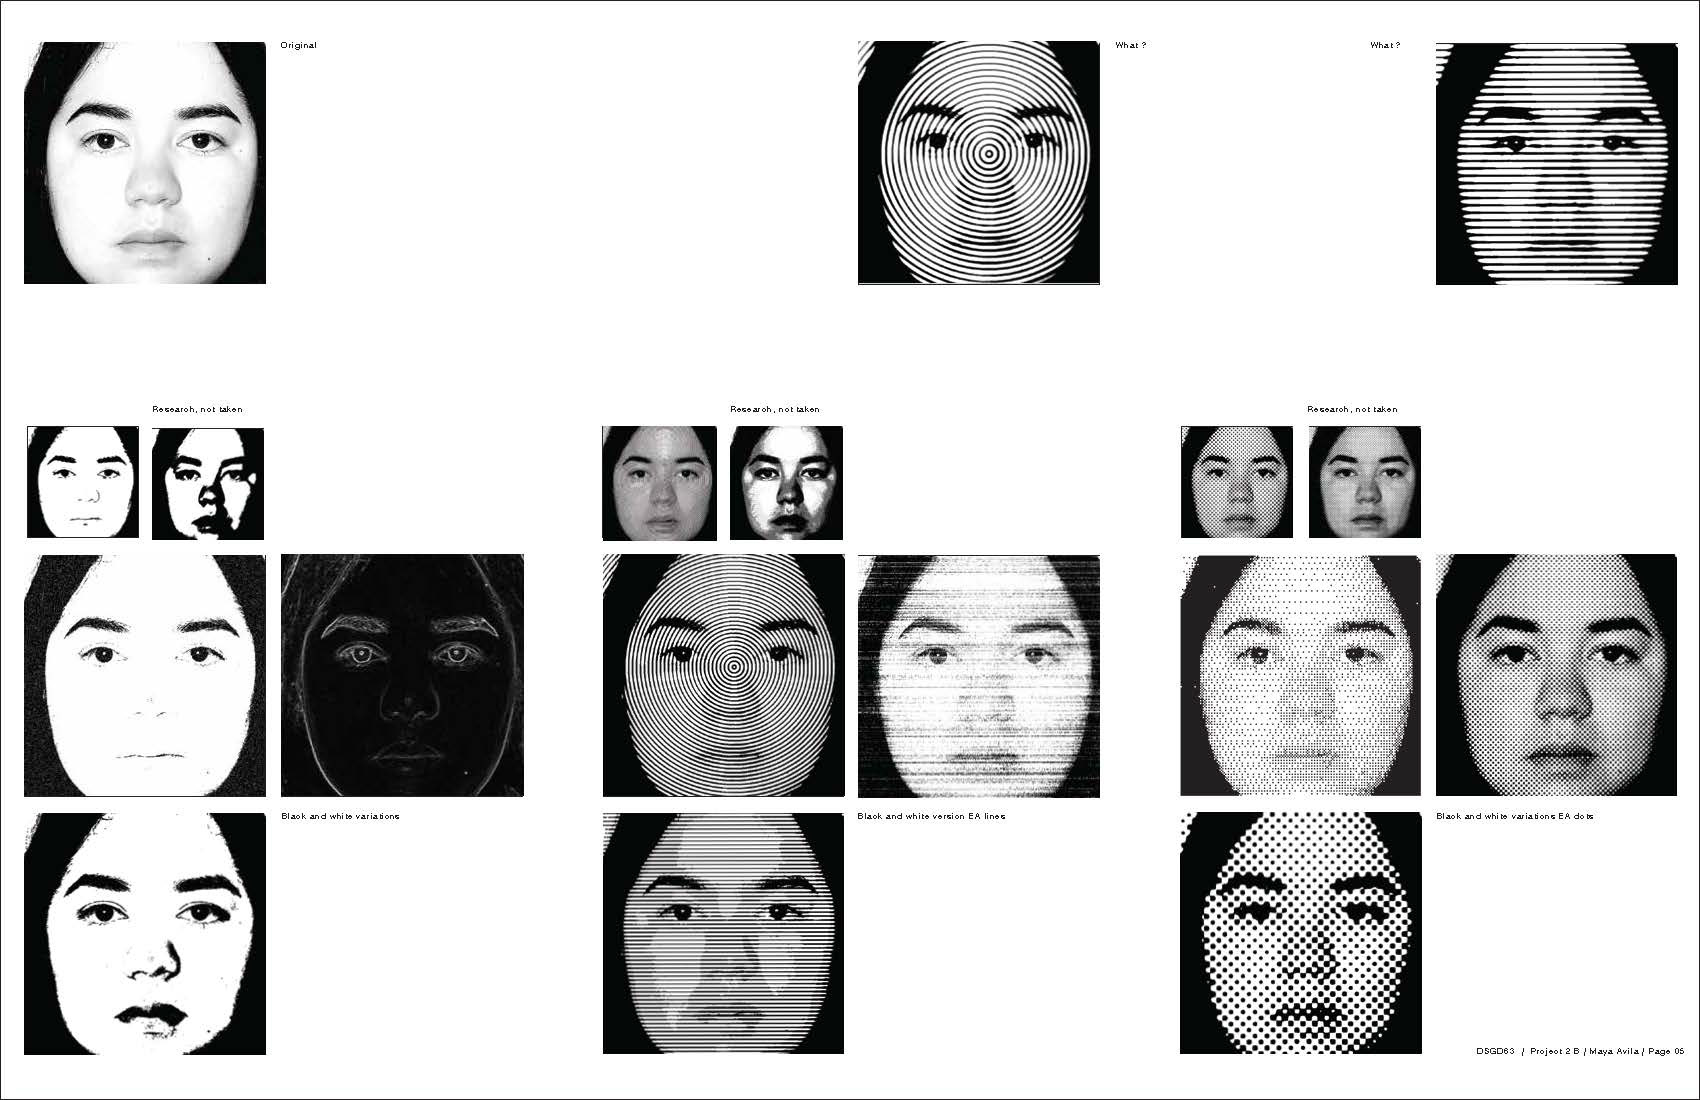
On the left is the final placements of my grayscale pixels. The chosen final version is the biggest pixel face on the right hand side. I will continue to work with this version for the rest of the project. On the right is some research utilizing different filters to help identify the features that make up my face. This research exercise was especially helpful in revising the placement of the pixels on my face.
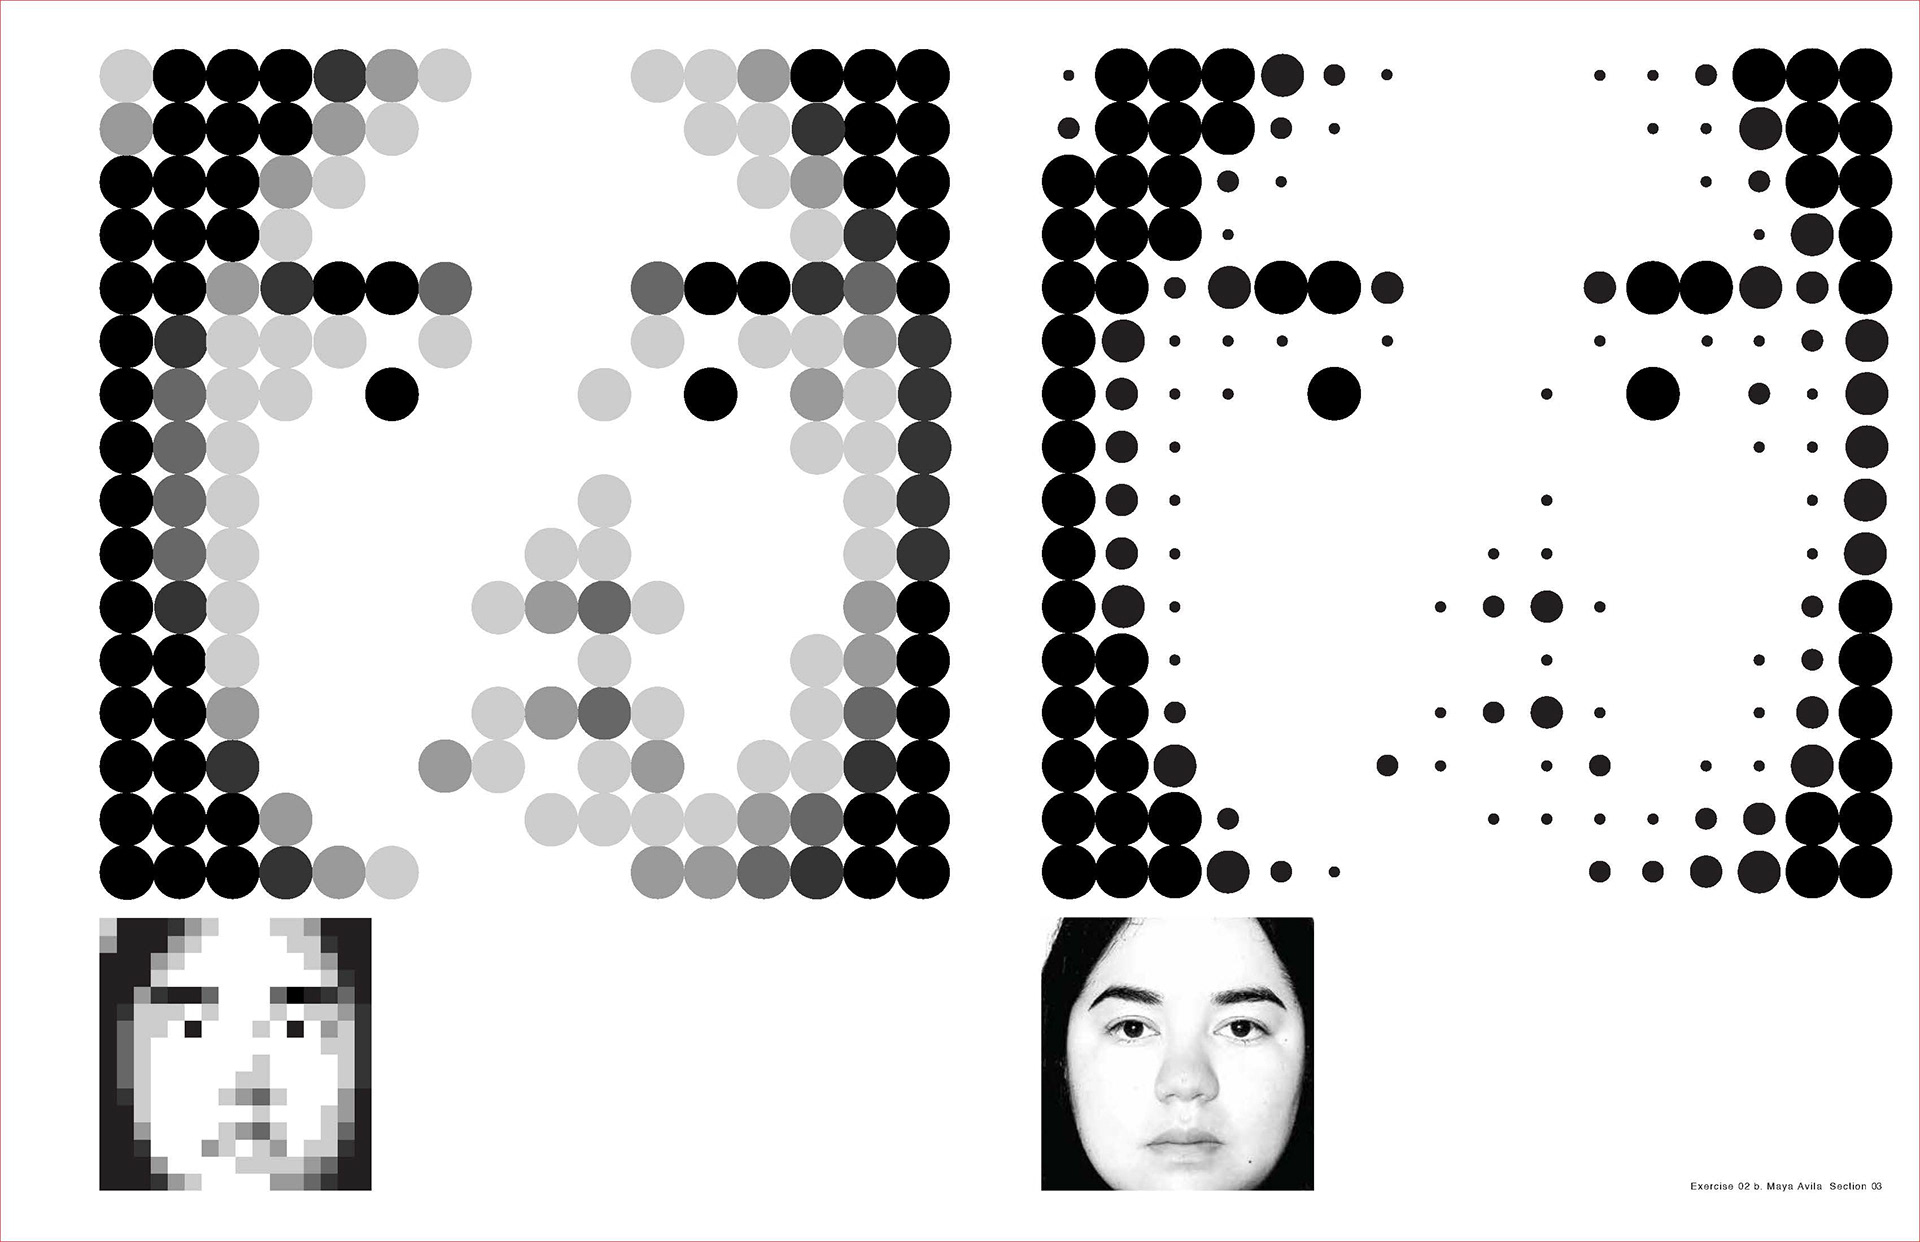
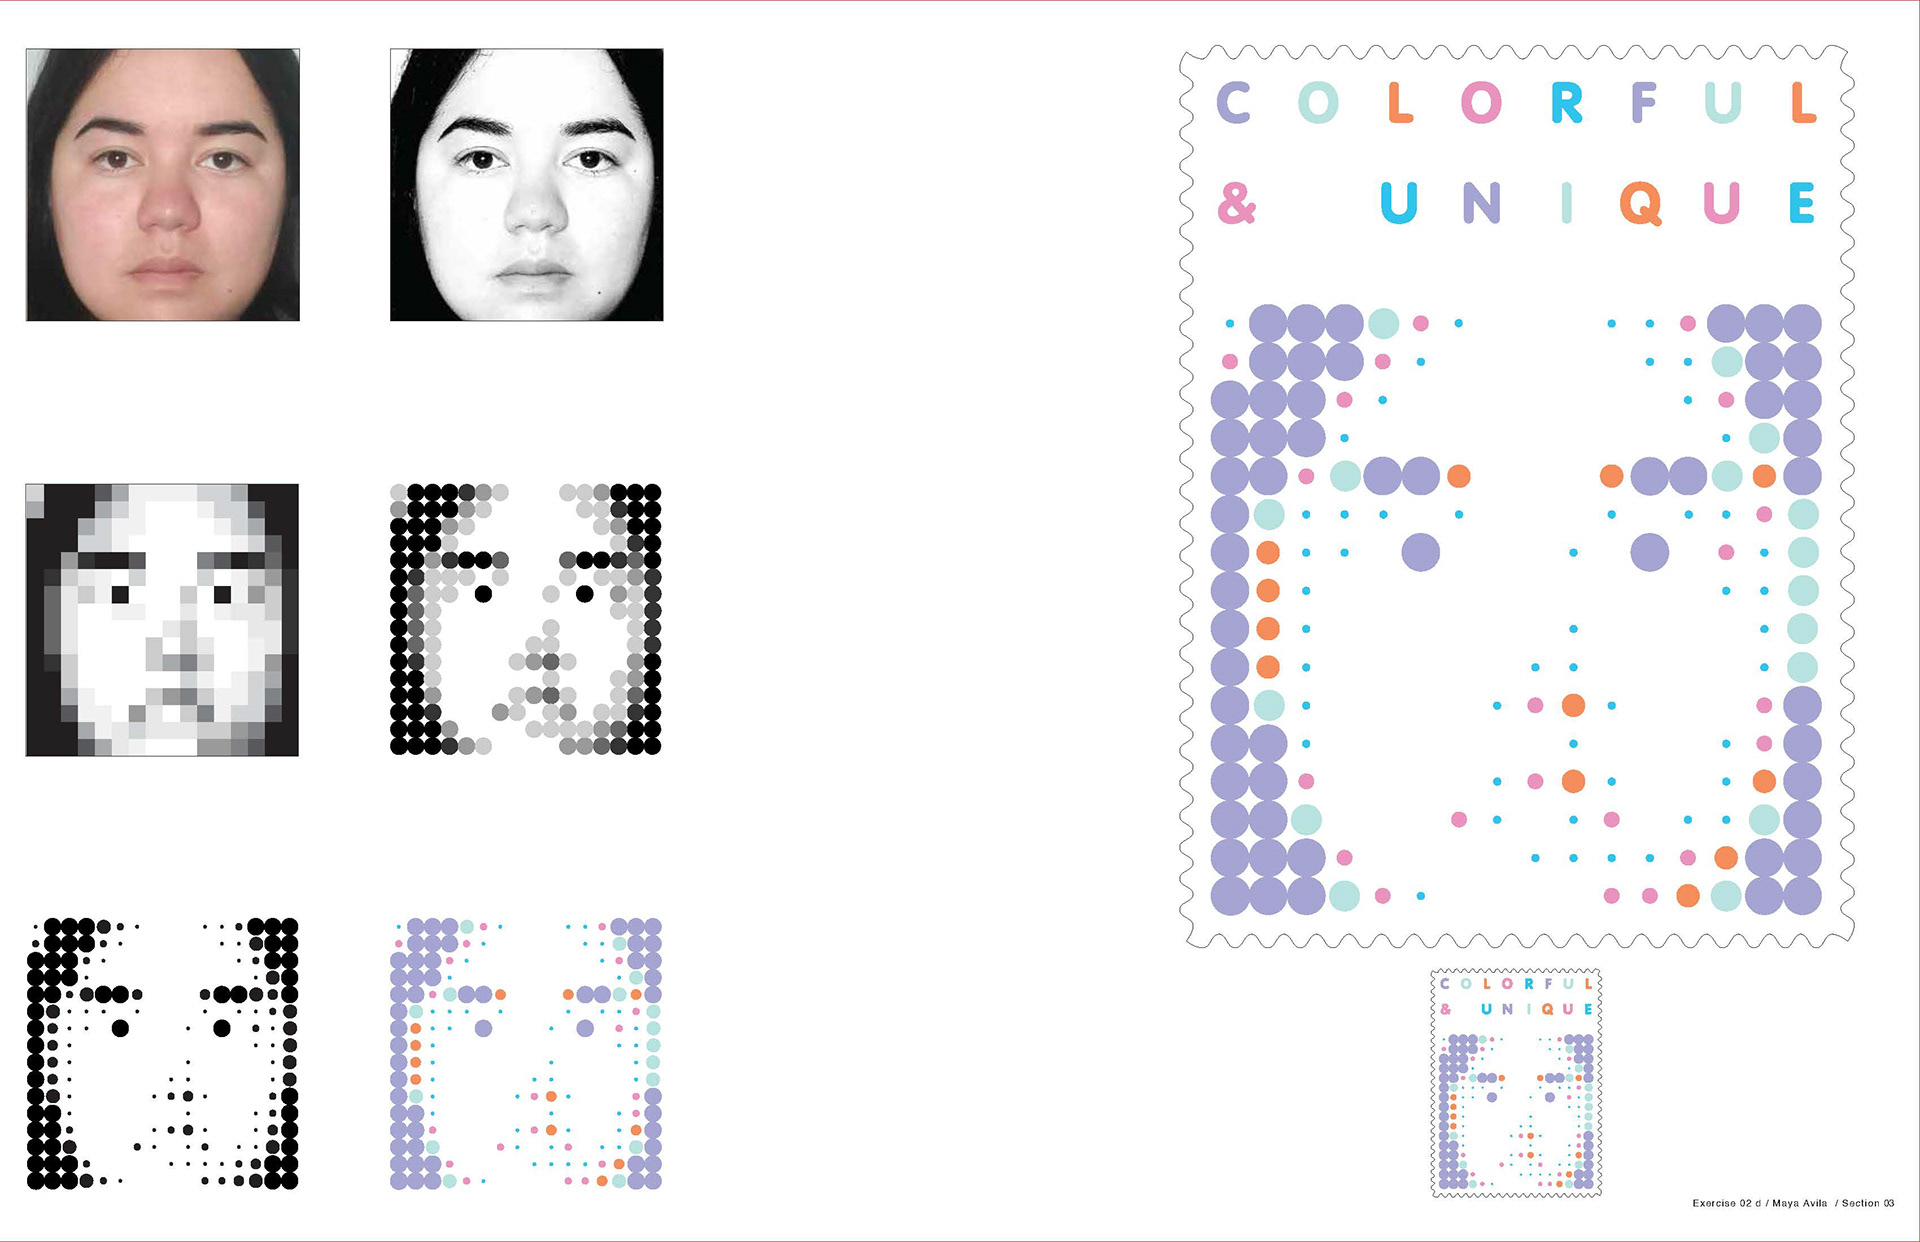
In this step I proceeded to correlate the percentage of the grays in the grayscale to the scale size of the dots. The rule for the grayscale of the dots was to size them according to the key features on my face. This helped determine where the smaller dots were needed for less attention and where larger dots were need to define the space.


Once the pixel result was achieved, I applied a color palette and arranged those colors to highlight the placement of the pixels/dots. One the left page is a research page of different color palettes. The one I chose to continue with is the biggest one on the page. One the right page is the complied steps to my arrived color-dotted face. The page below depicts the steps from the start of the project to the final postage stamp.