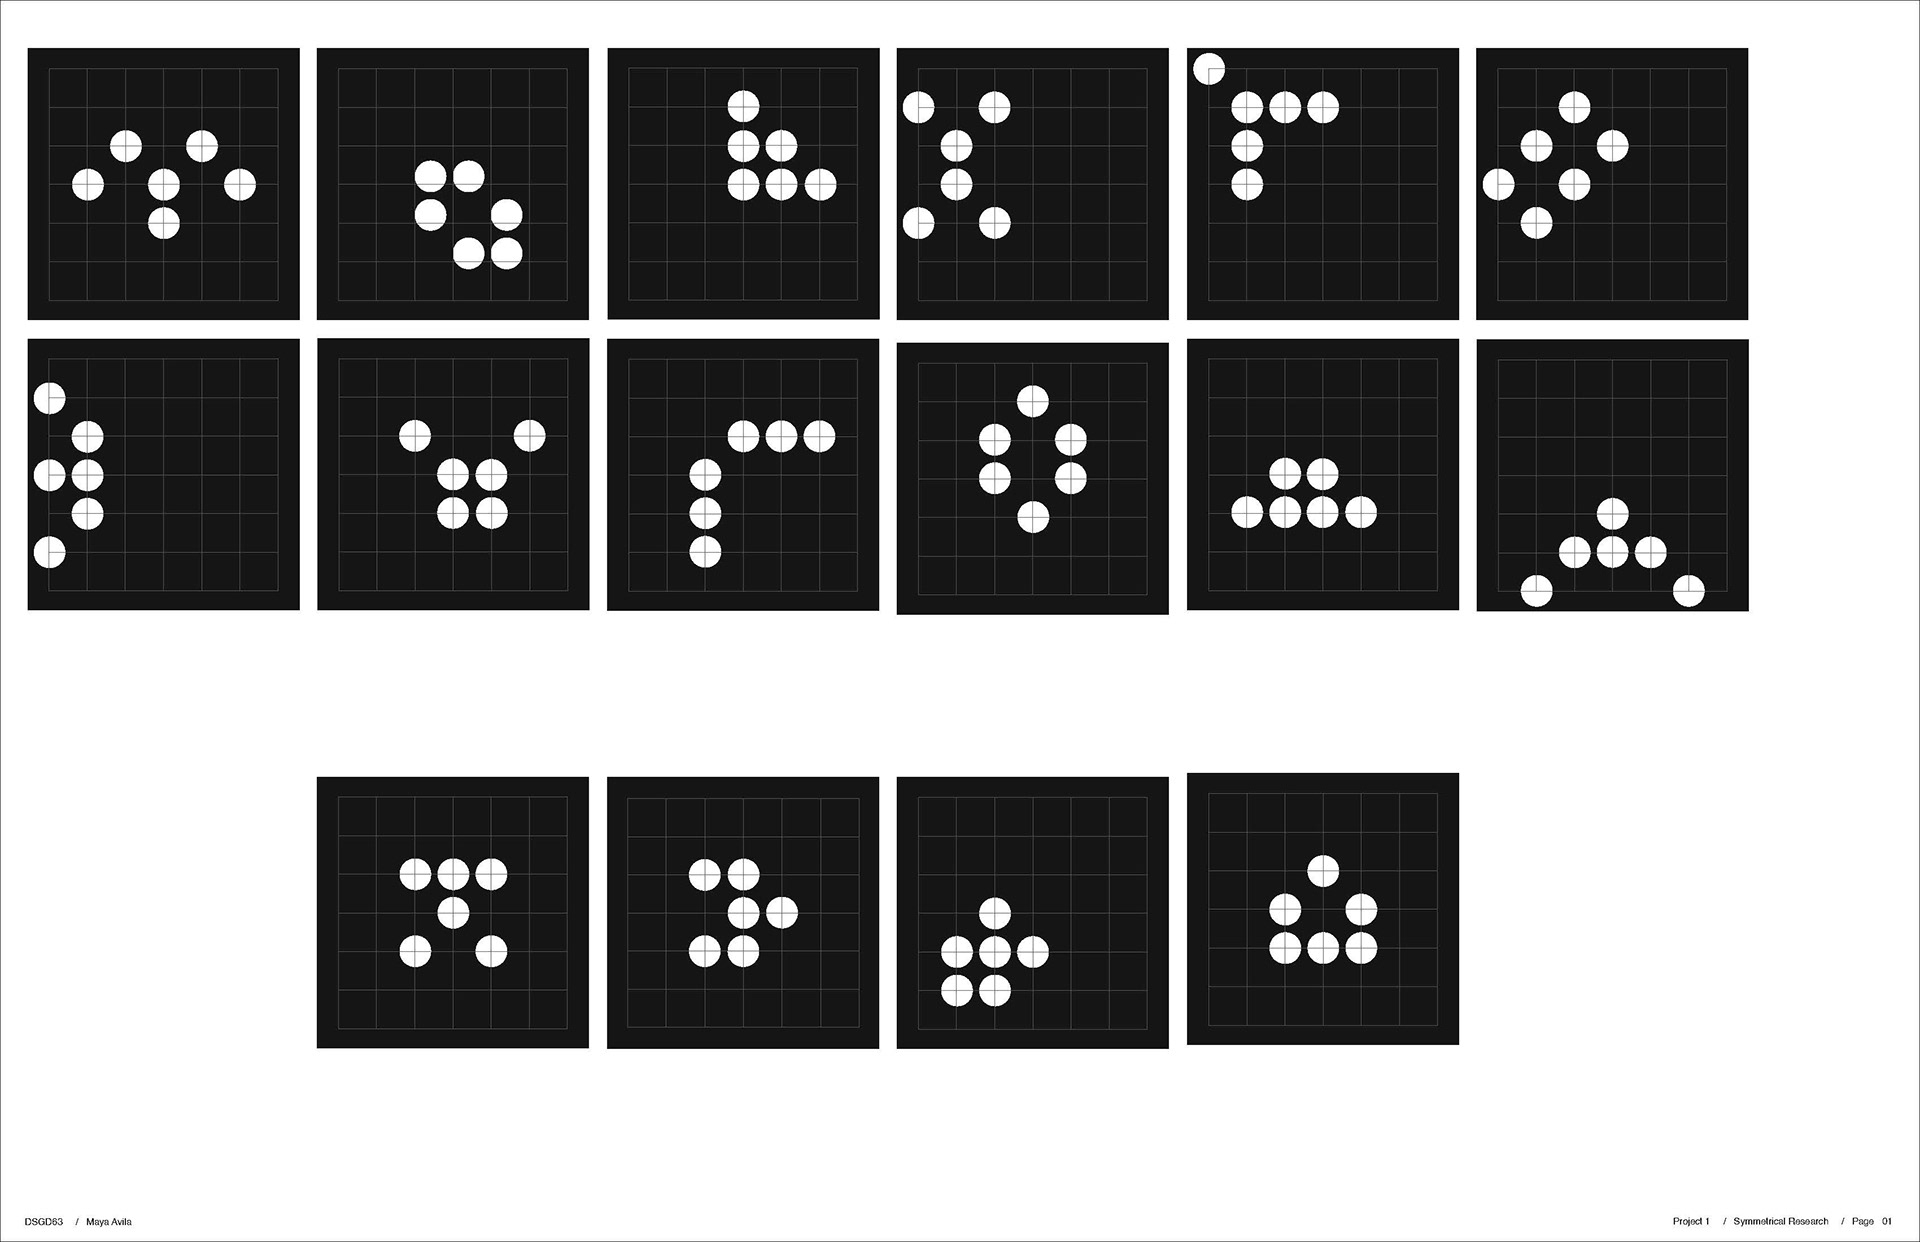
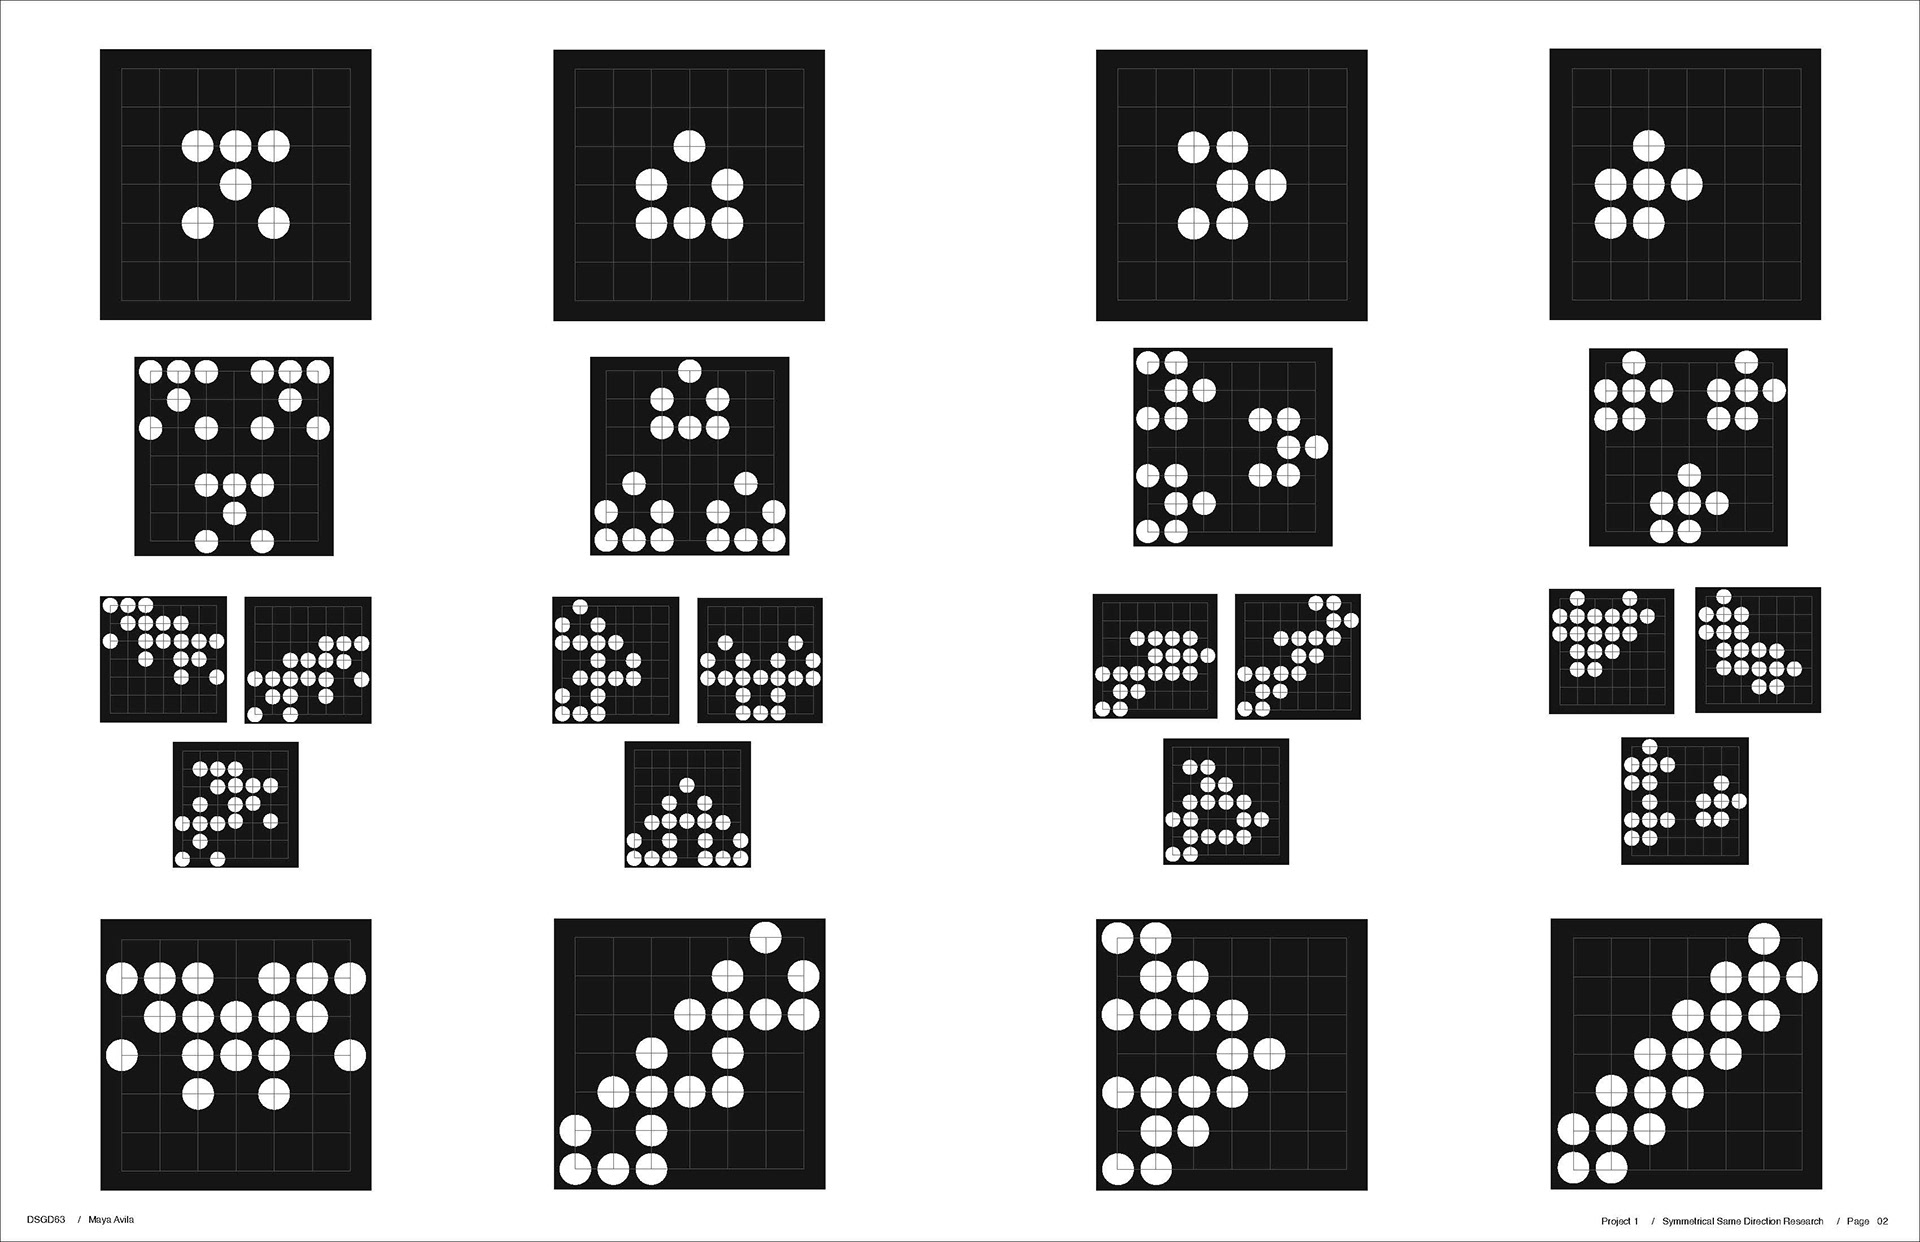
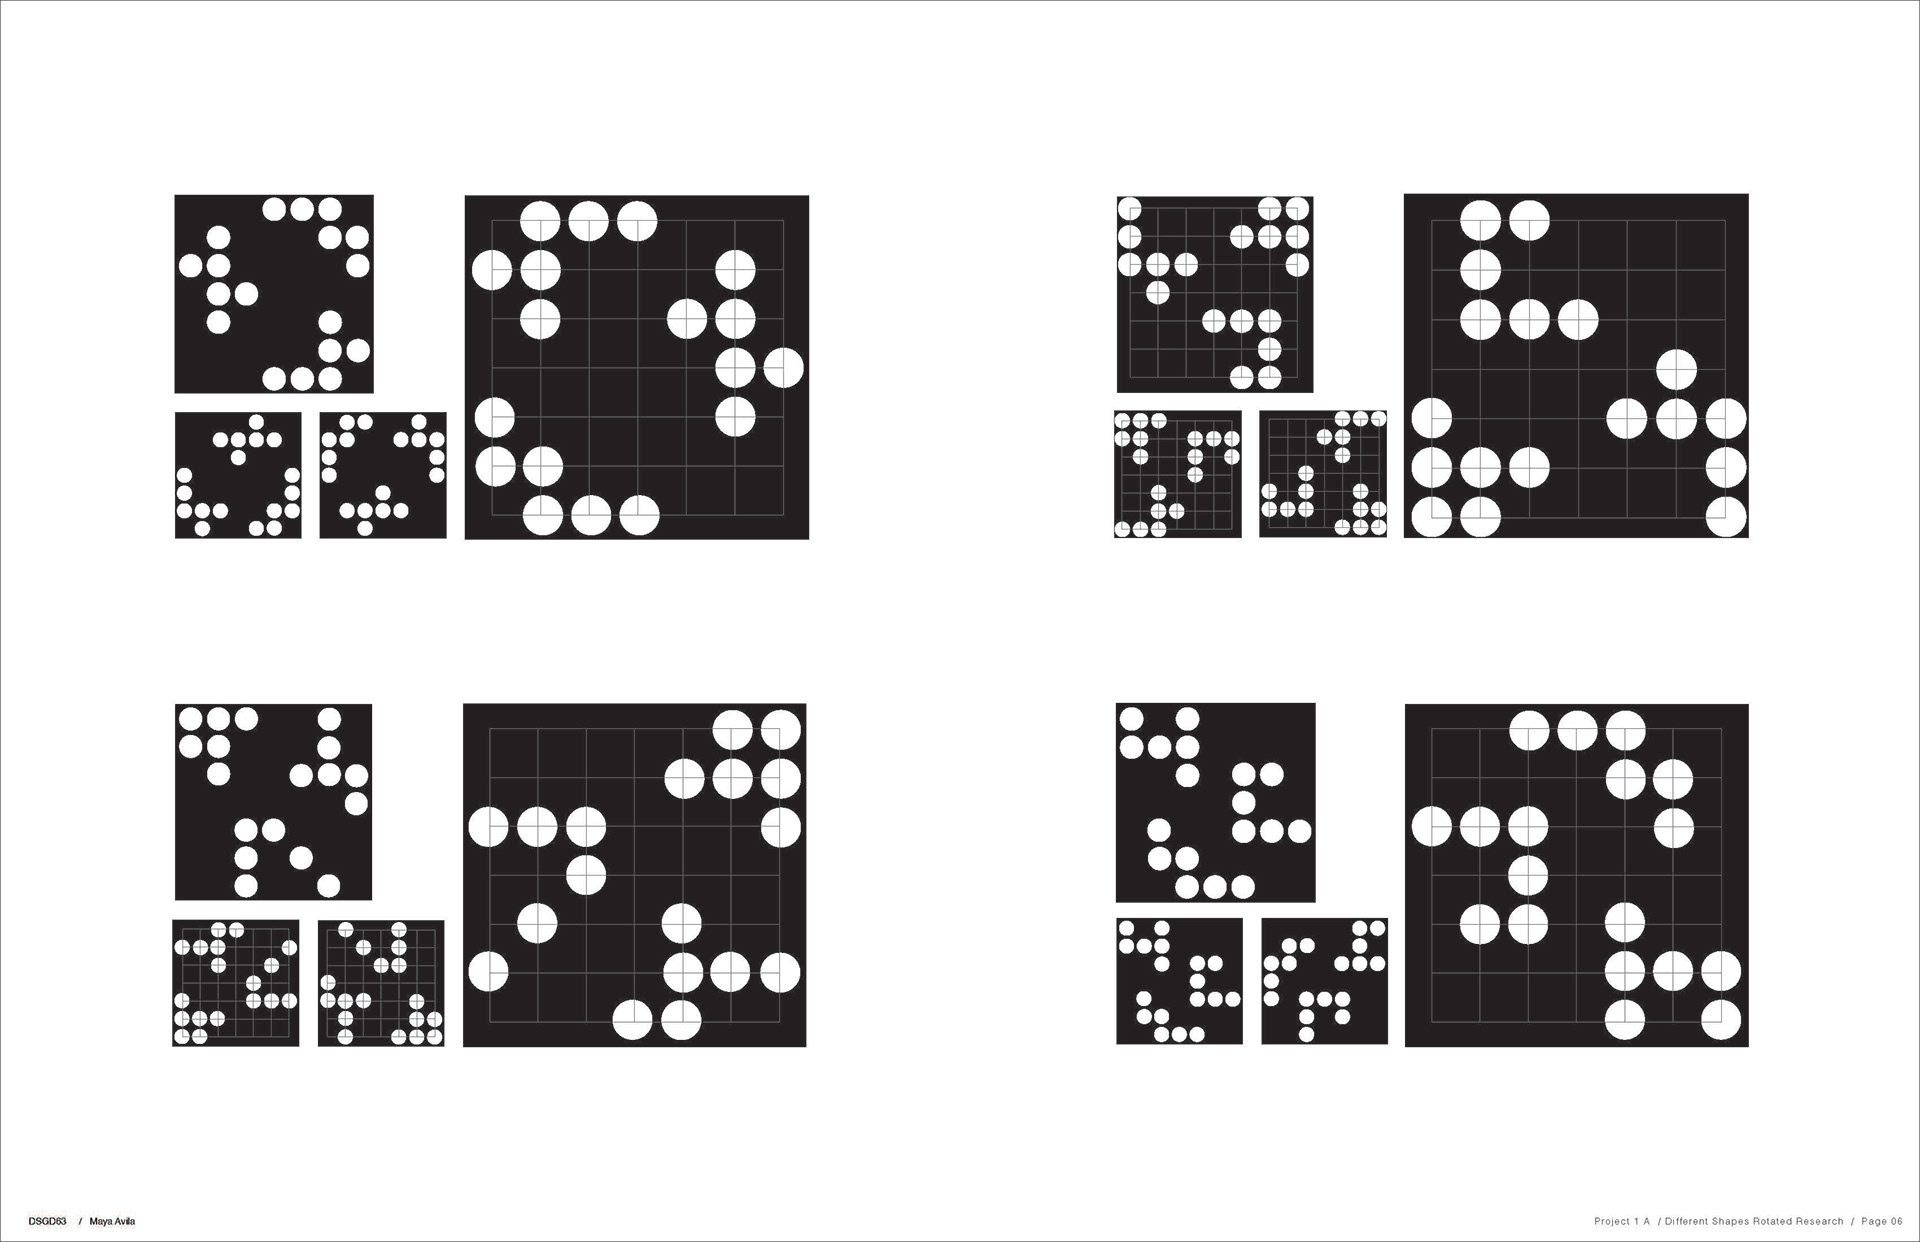
On the left is a page of six dots arranged into symmetrical shapes. The four shapes that are at the bottom of the page are those selected to move onto the next step. On the right page the symmetrical shapes are combined in groups of threes in two different methods: grouped together in one square without touching each group and in the other square each group is touching without overlapping.
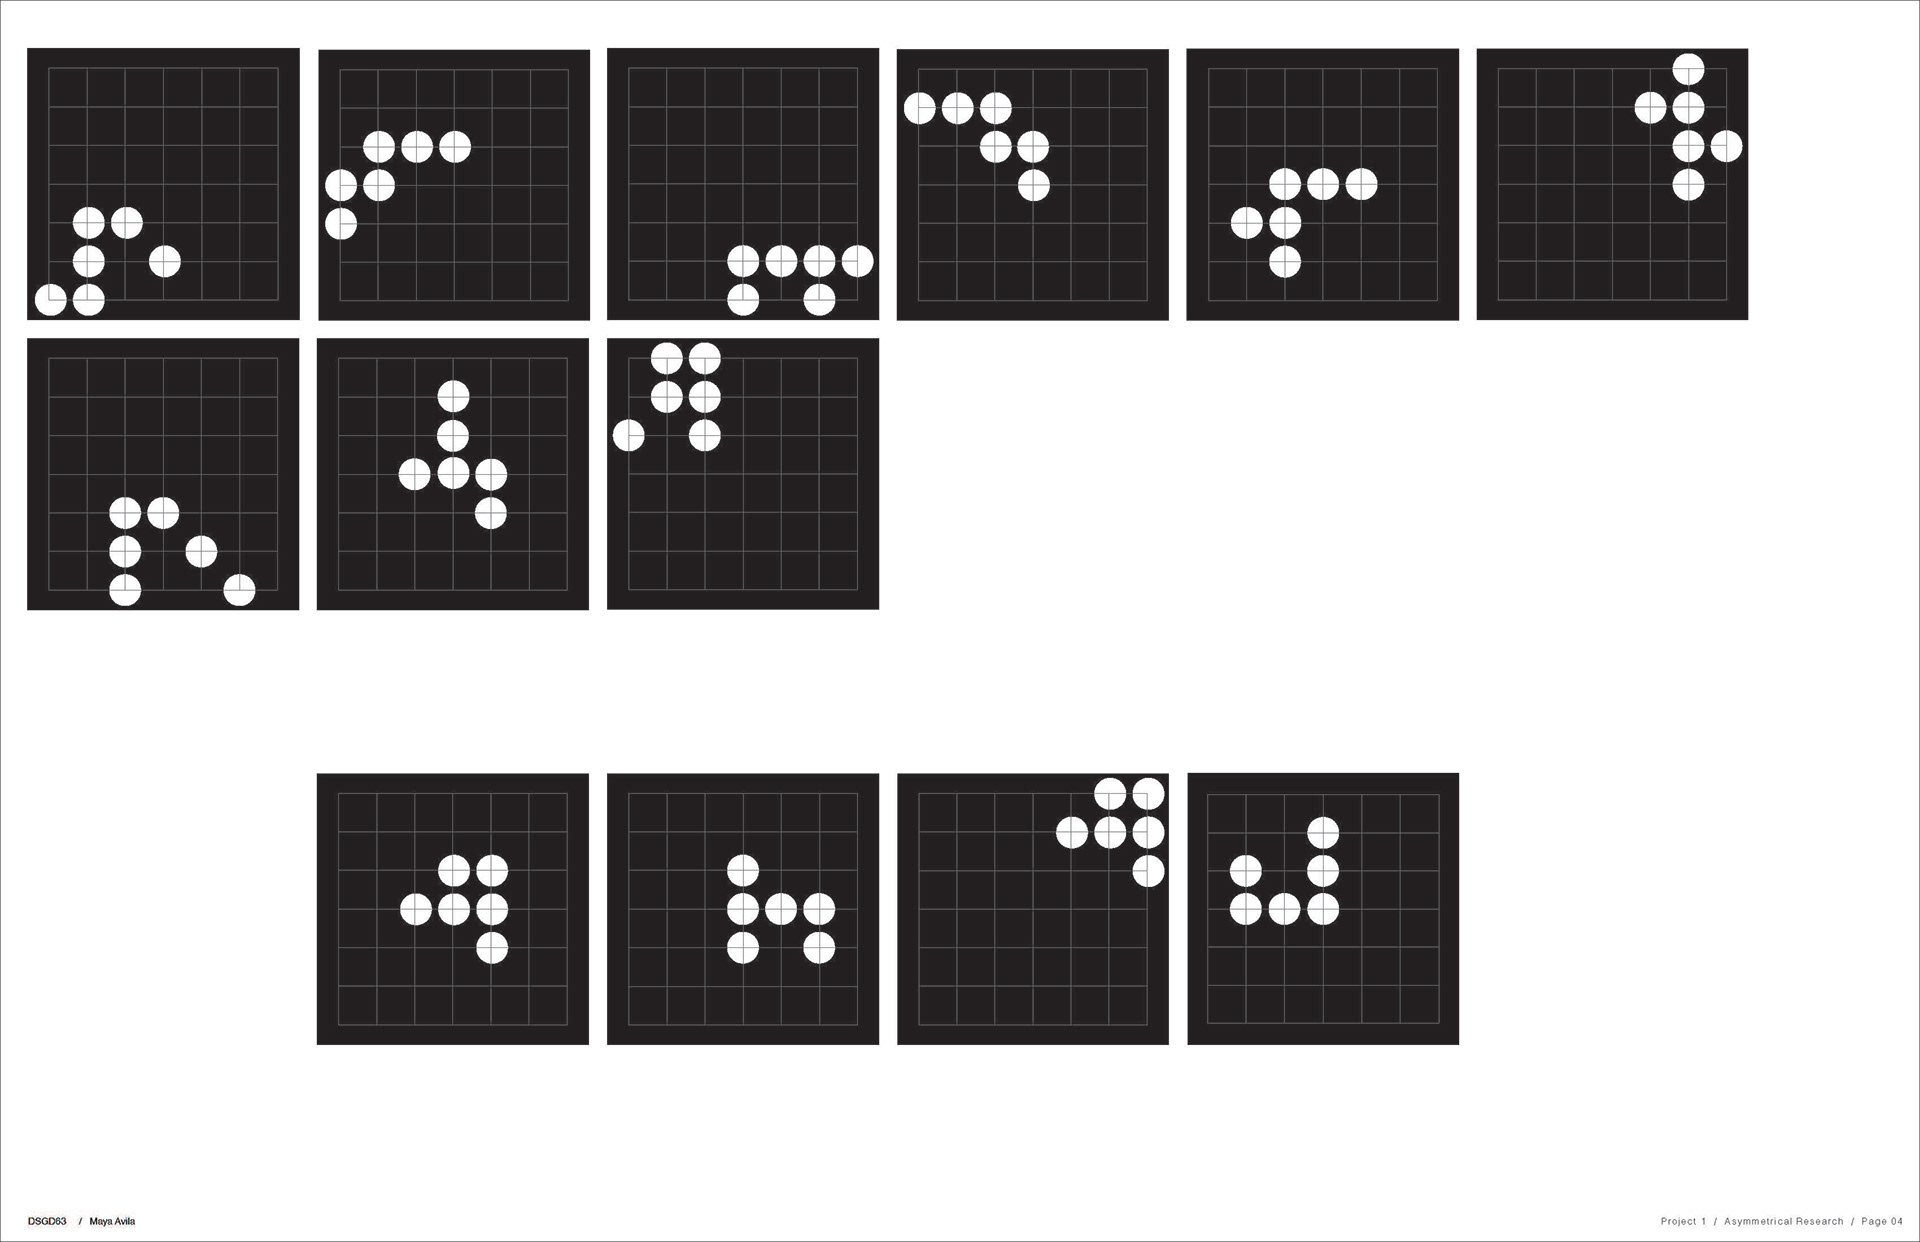
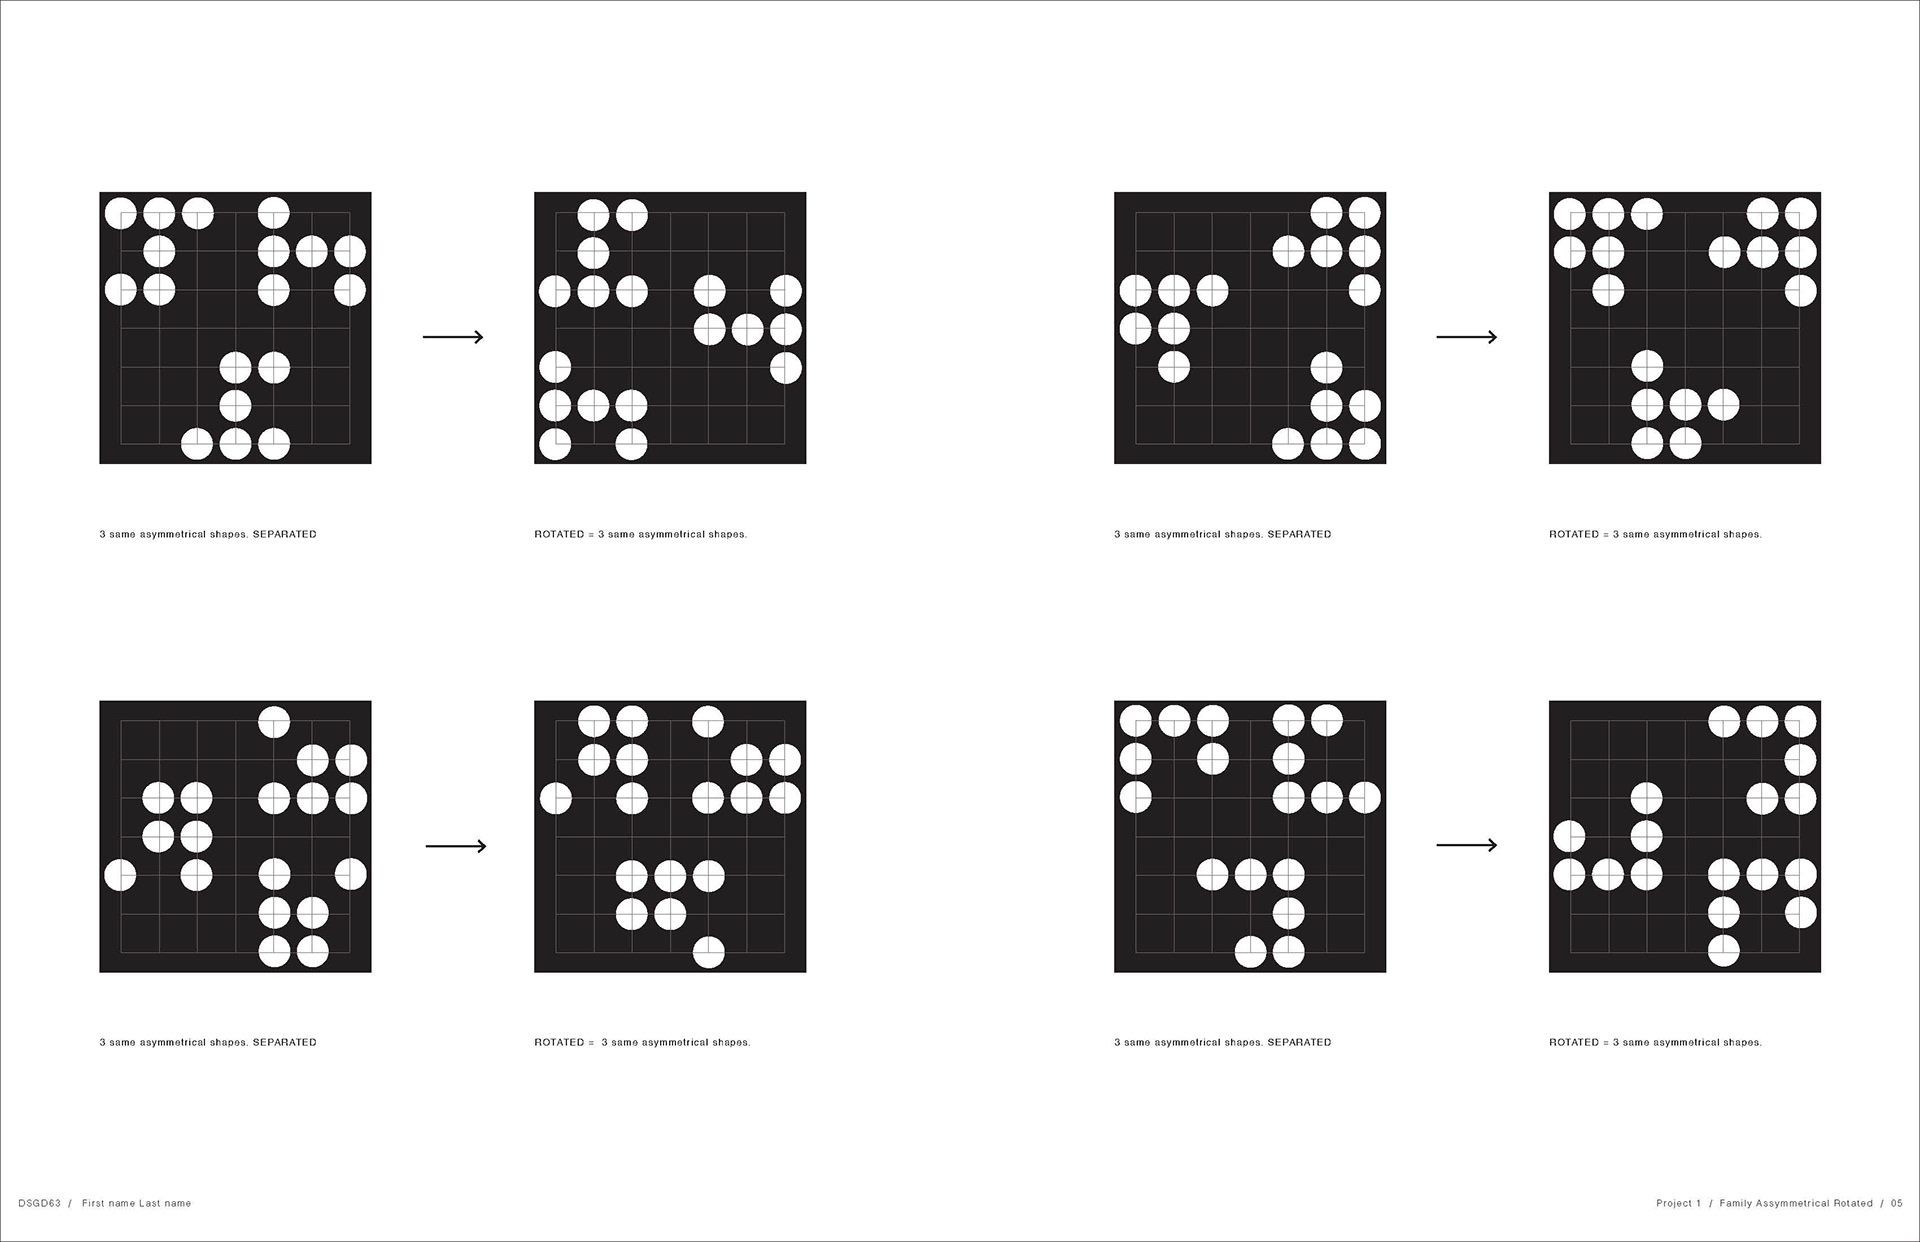
On this set of pages, they are centered around asymmetrical shapes using another set of six dots. Just as the previous set, the four shapes at the bottom of the left page are those selected to move onto the step. The right page depicts the asymmetrical shapes in a black square copied 3 times and rotated in different directions. The whole square containing the shapes is then rotated again.
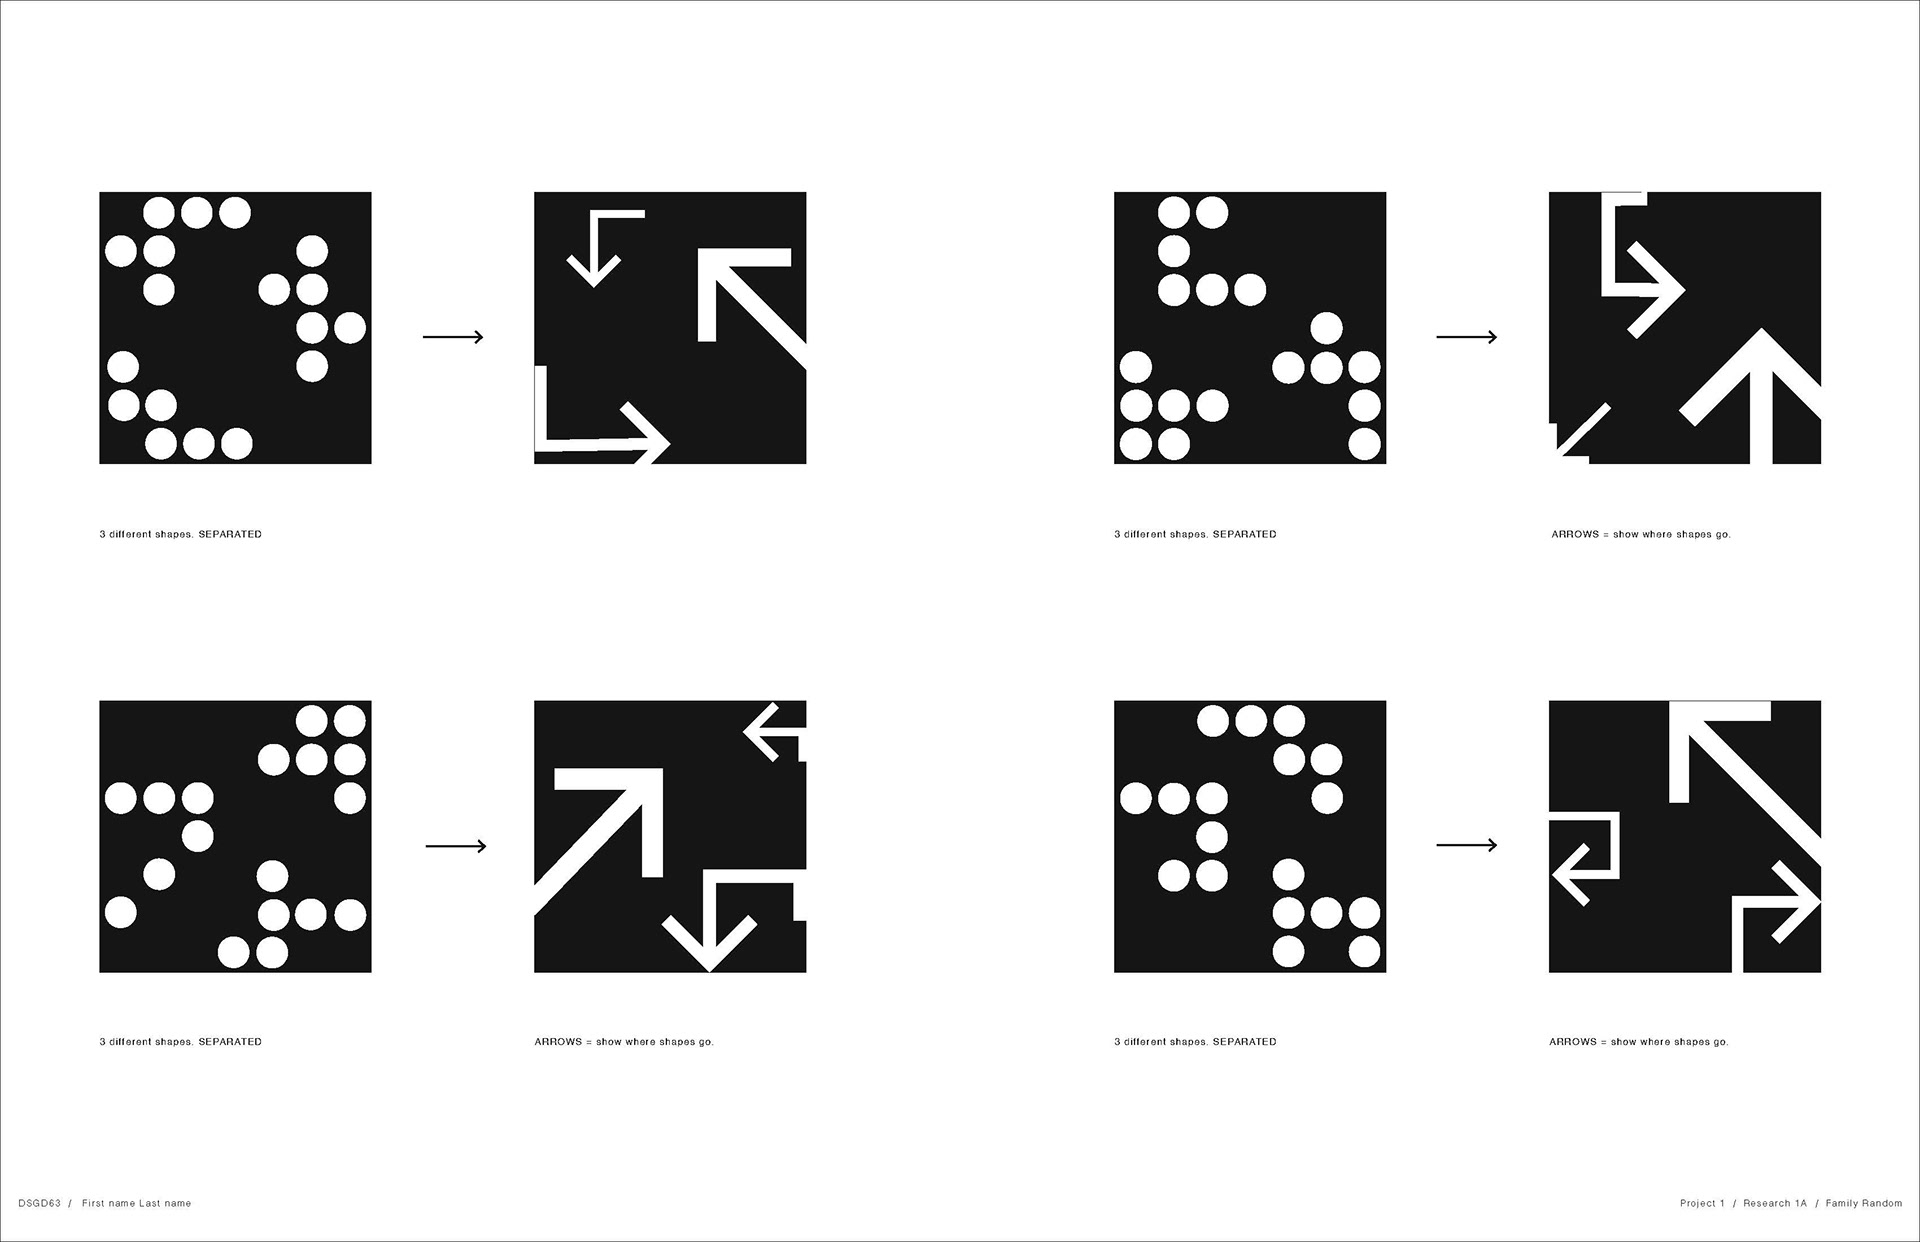
The left page depicts a combination of 3 different asymmetric shapes. The grouped shapes are then rotated to a desired position. The right page uses the asymmetric shapes to layout the position for arrows. Using the directions of the asymmetrical shapes, I determined what direction an arrow would go. This not only helped establish hierarchy and scale but will also set up the foundation for the next step in this project.
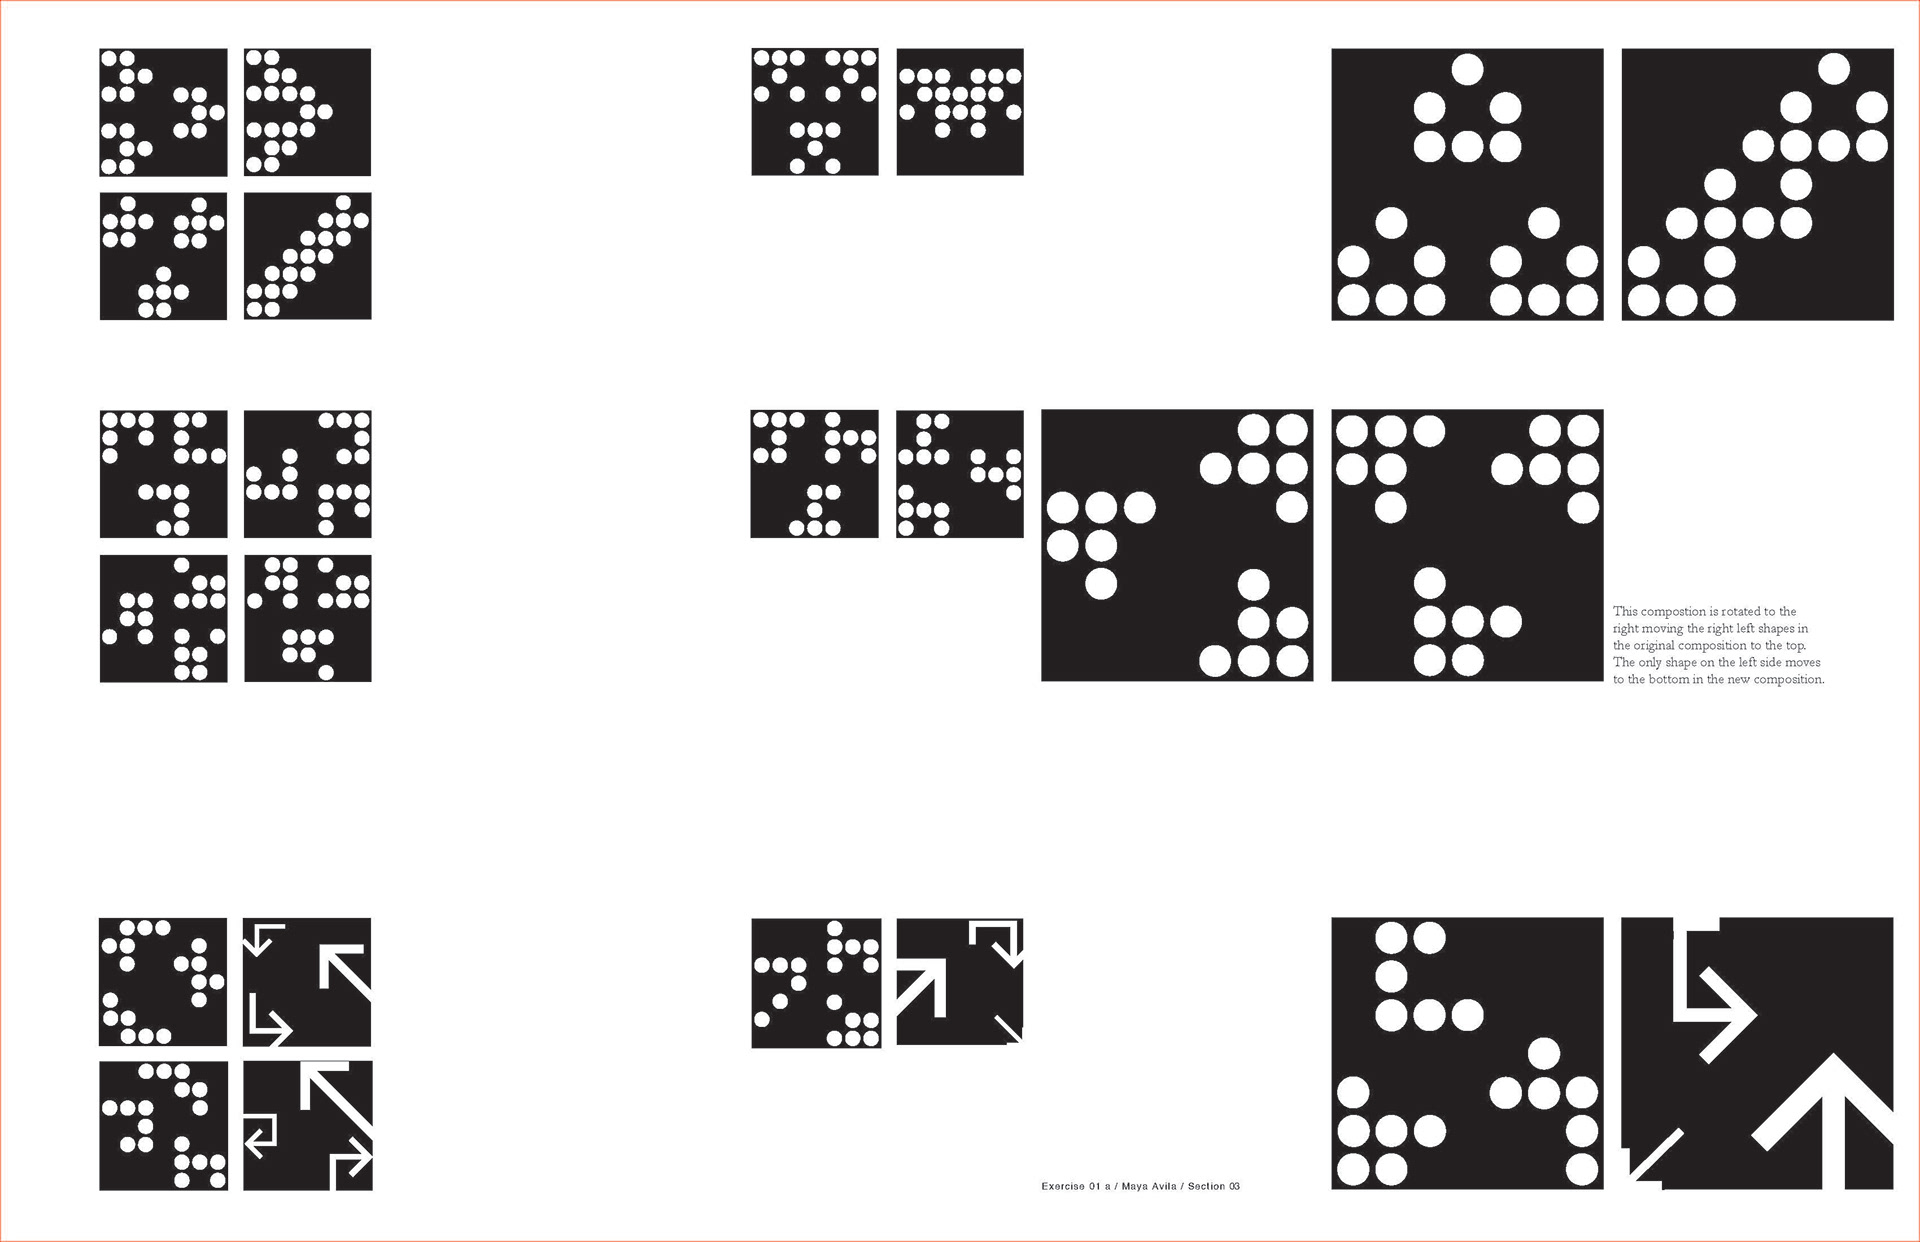

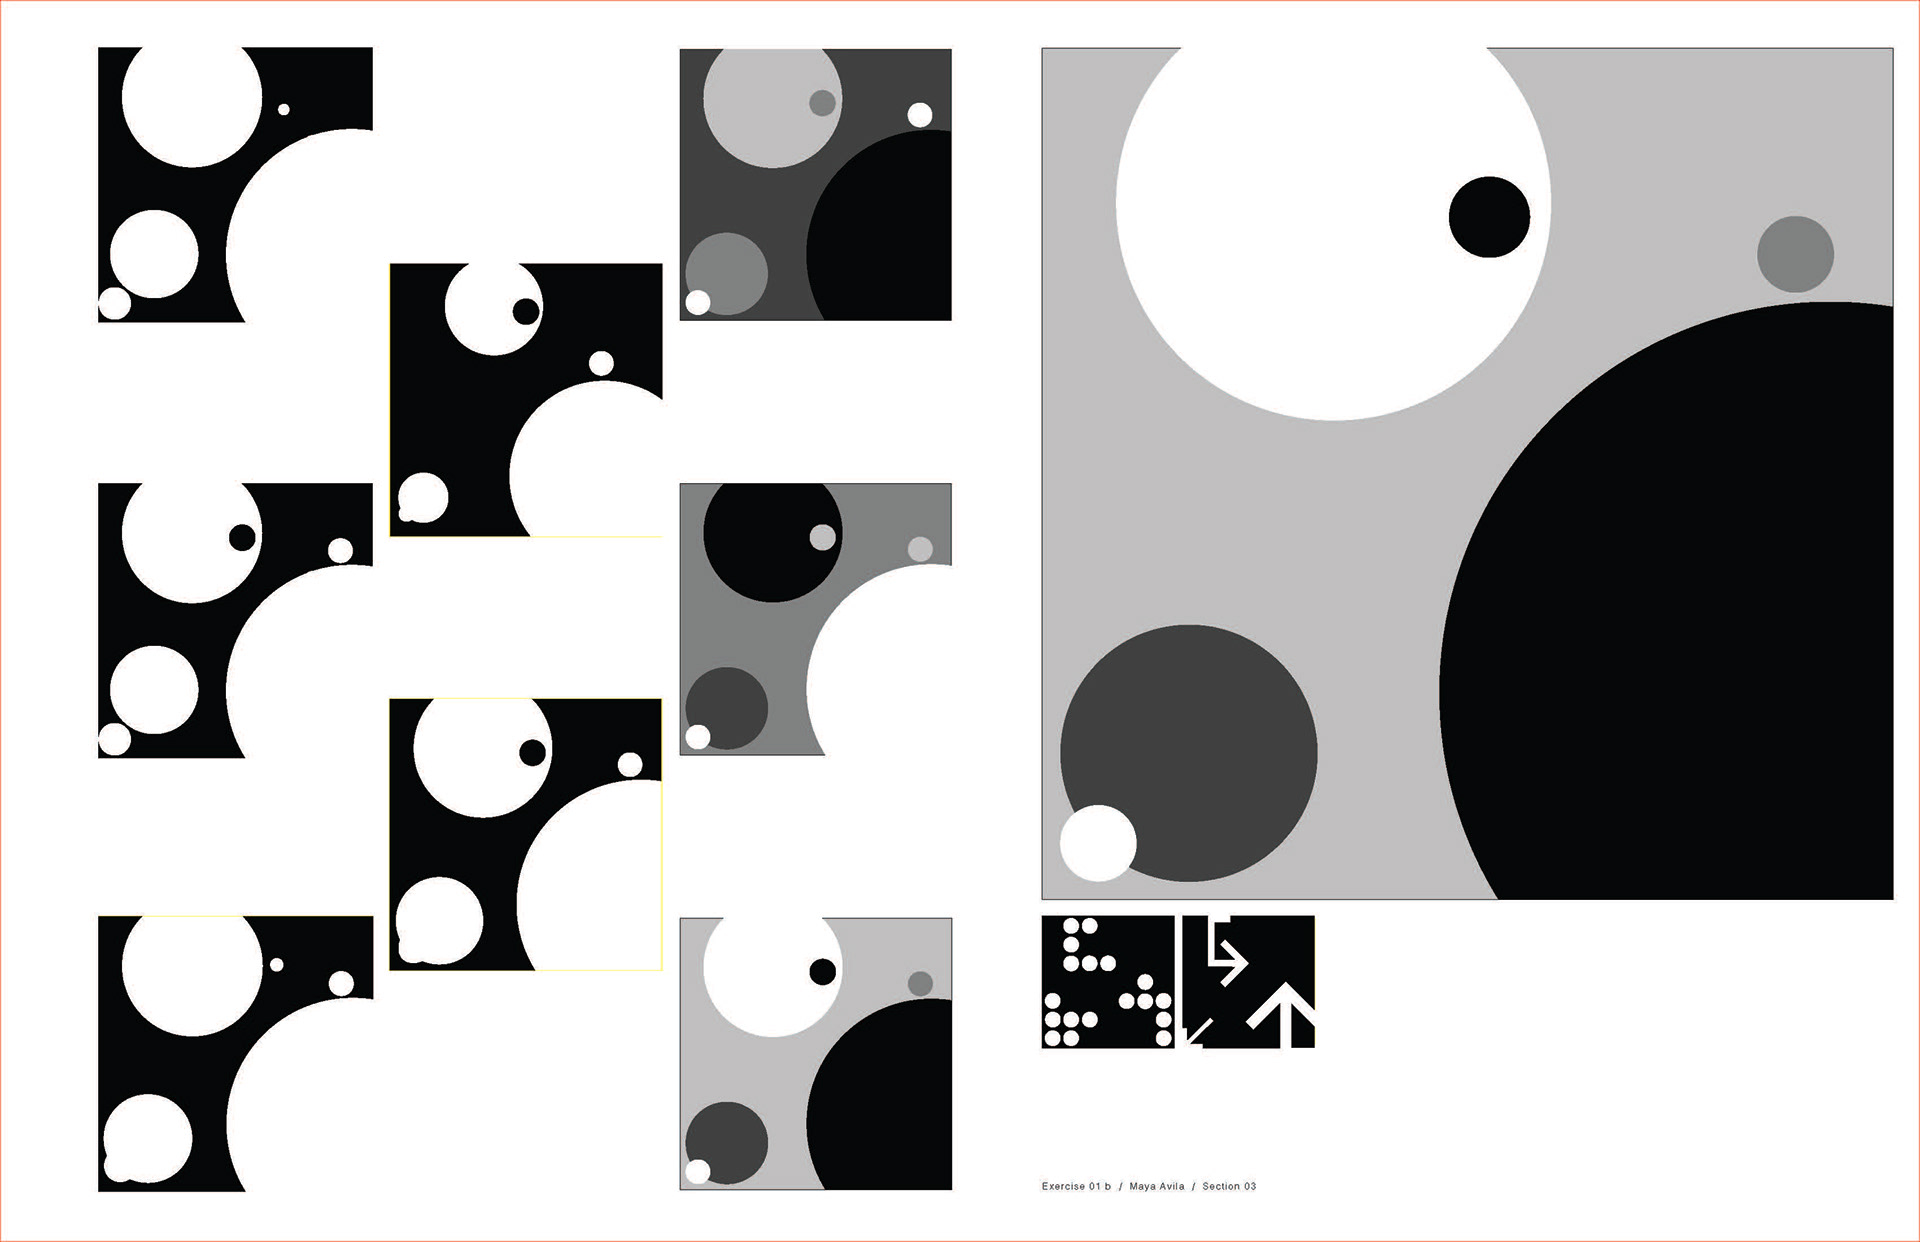
This left hand page depicts the previous steps as well as the final chosen solutions. On the right page, the final dot and arrow square are shown in the upper left hand corner. Utilizing the arrow composition, the six circles are placed to show the direction of the arrows. The circles are also scaled to help display hierarchy and establish direction. The first set of black squares show the six white circles with out overlapping. In the second set of black squares, the same white circles are duplicated. In these set of squares, one of the white circles is removed and a black circle is introduced.

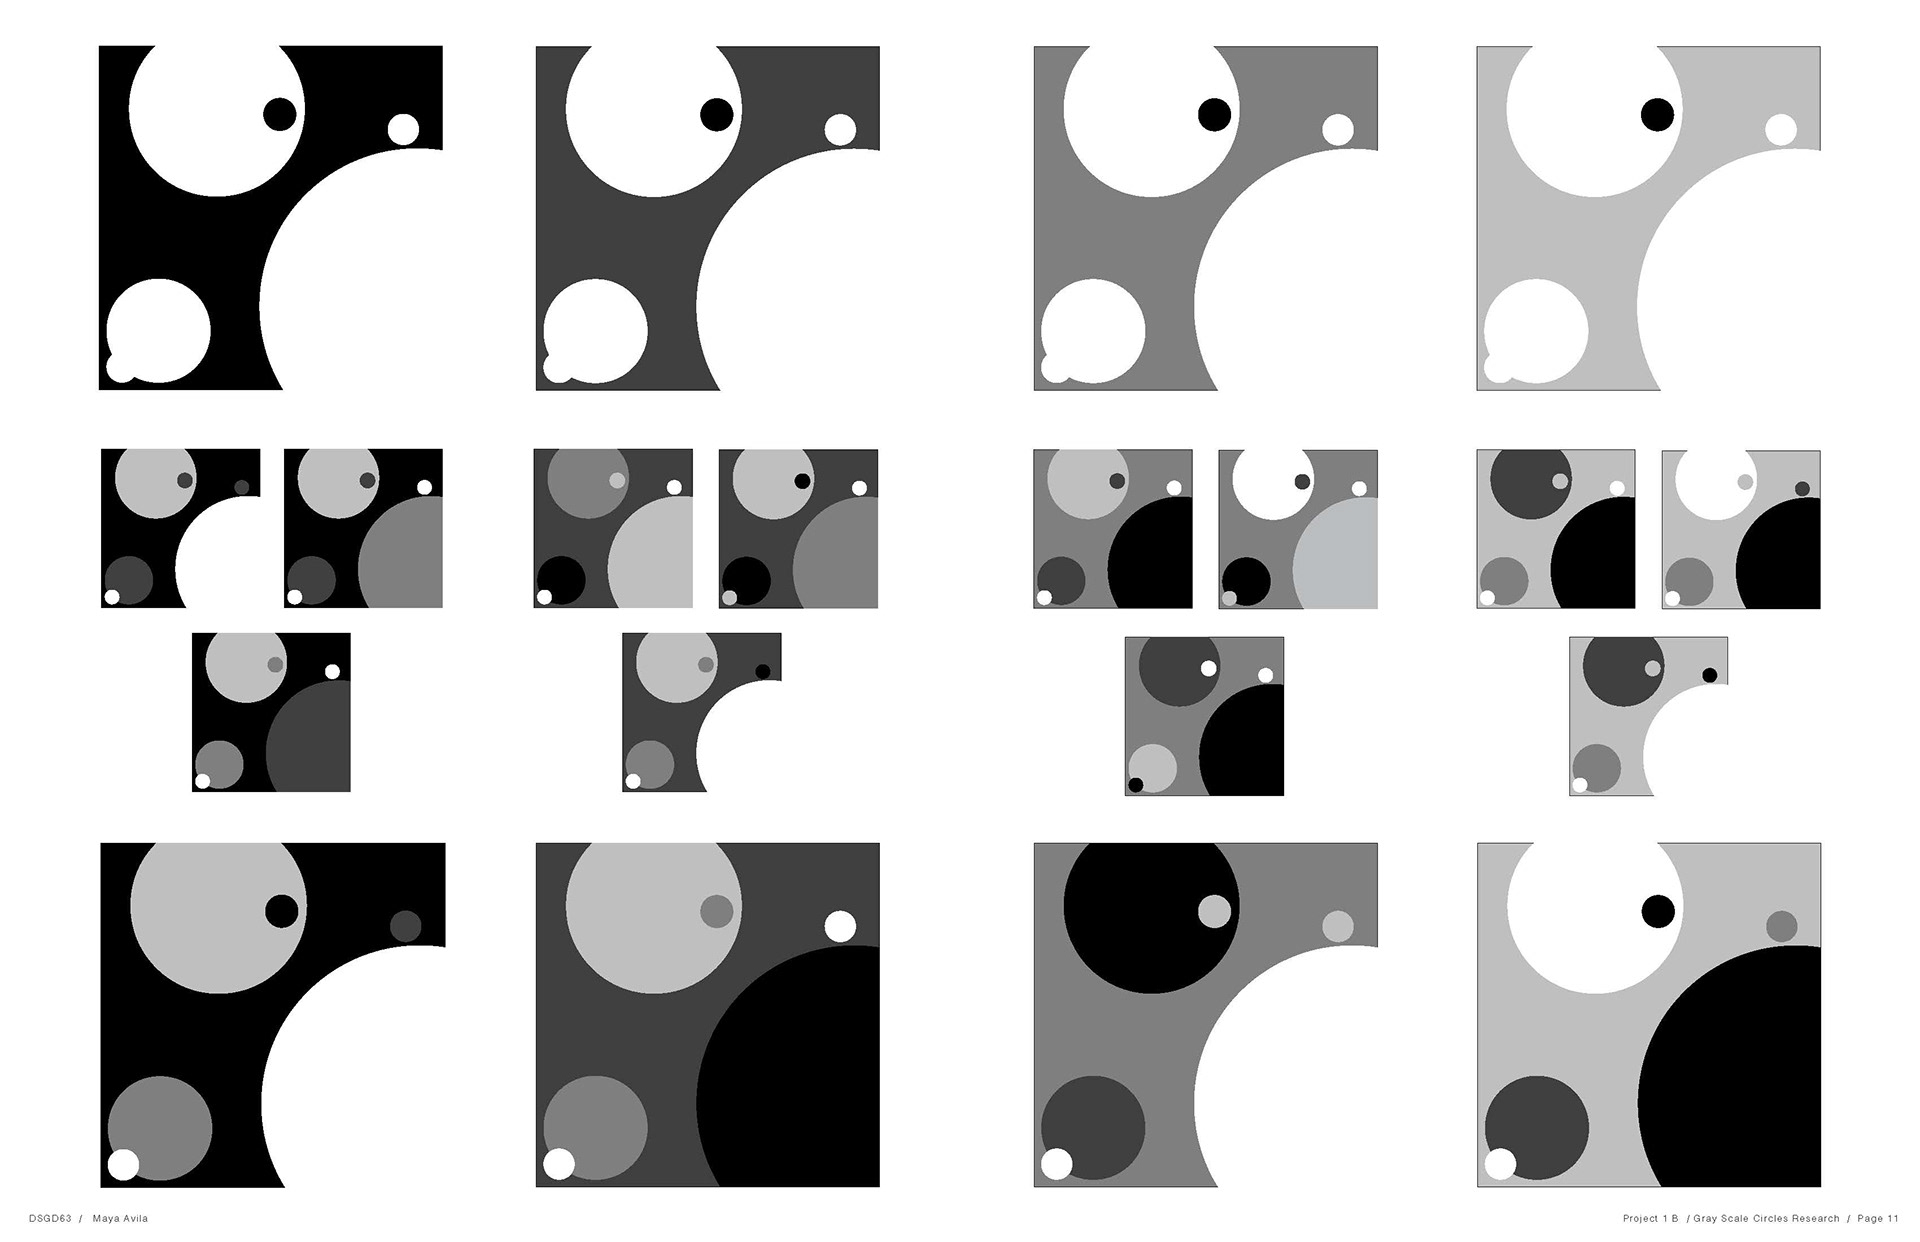
In the set of square in the left hand page, the circles are now intersecting further clarifying a direction. On the right page, a grayscale has been introduced. Depending on where the viewer's eye is wanting to be directed, the boldest contrast are placed. The final solutions of each grayscale variation is placed on the bottom of each column.
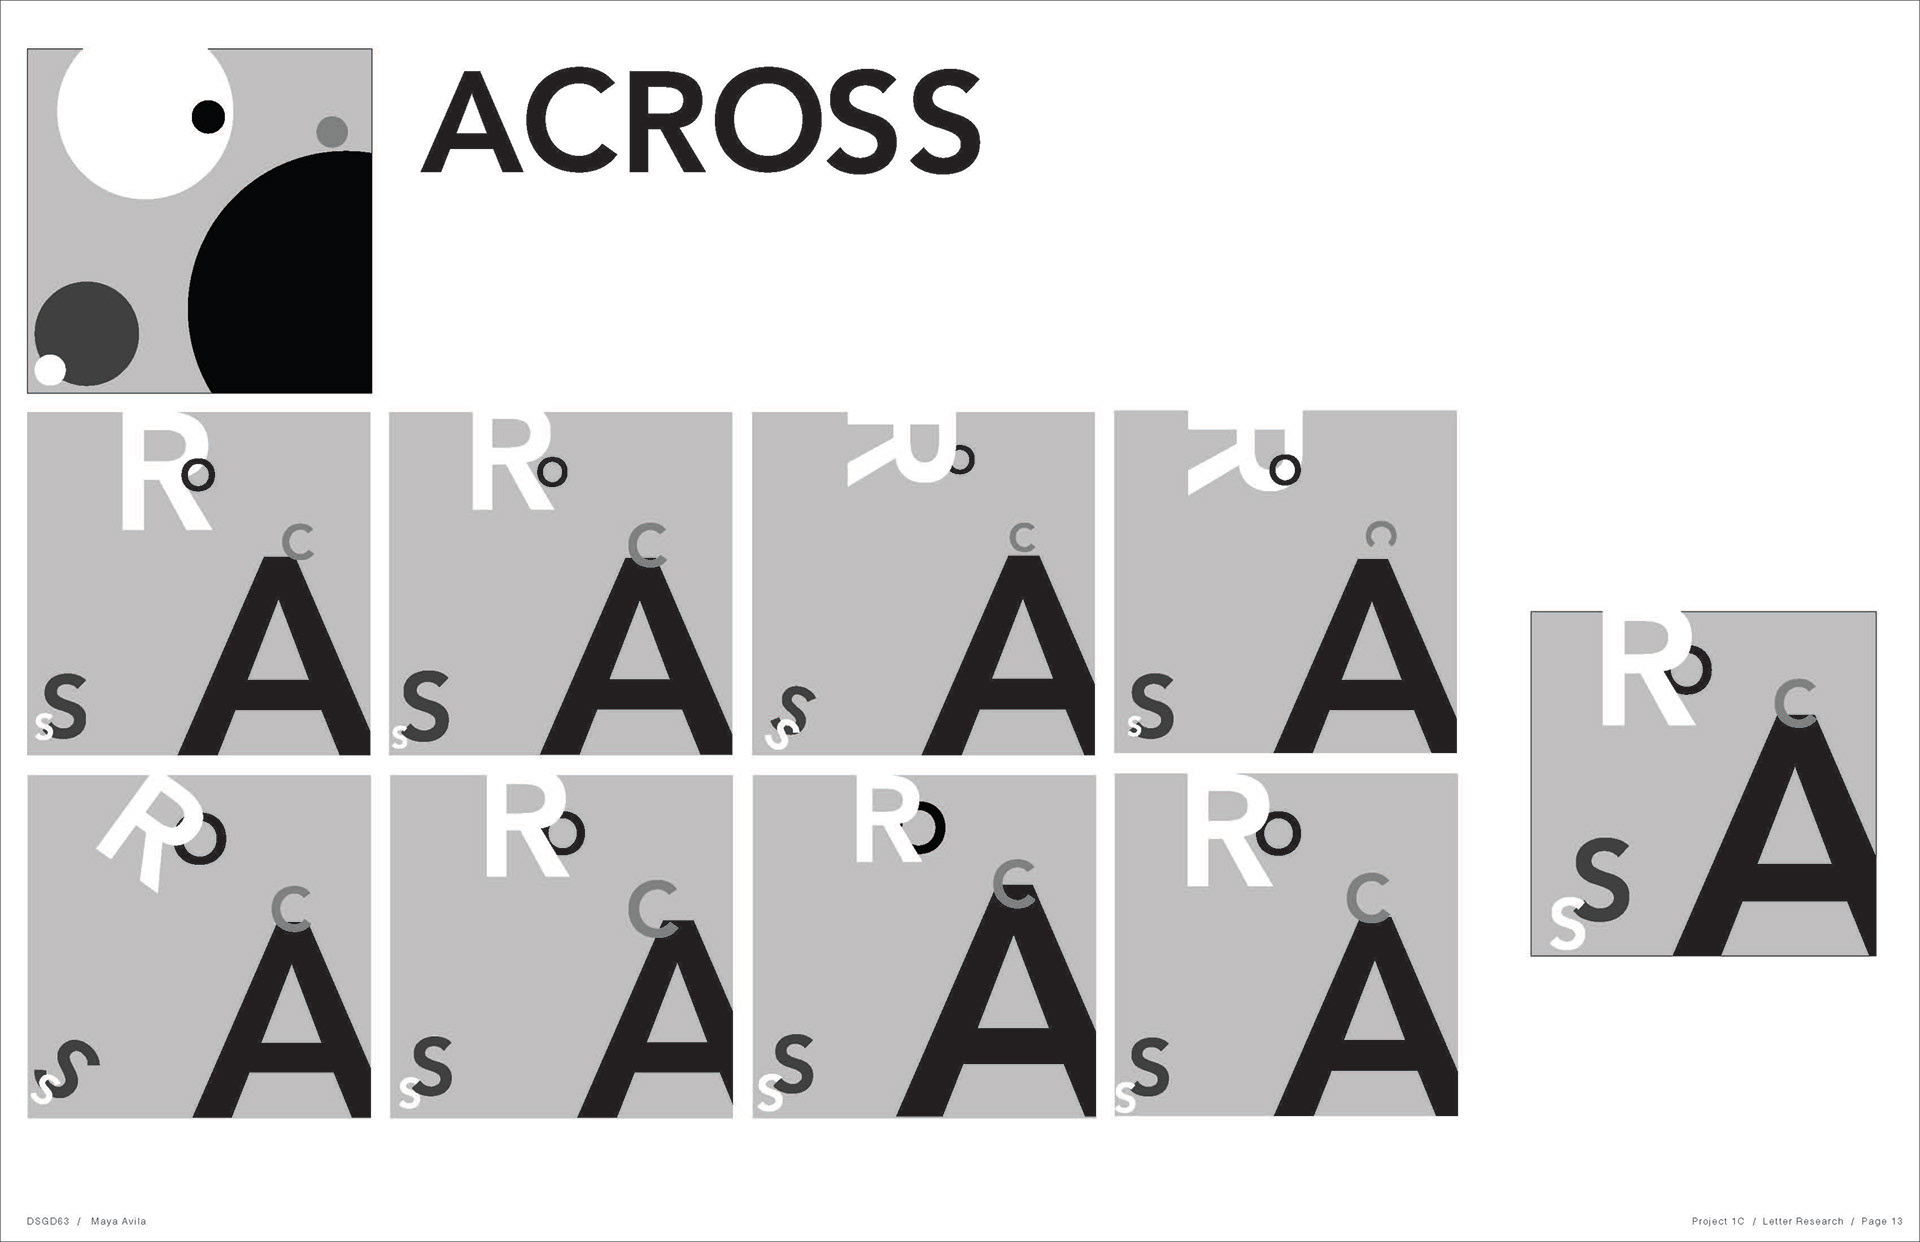
Cumulative steps of each circle variation is placed on the left page. The final solution is displayed on the right. Having moved onto a finalized version of a circle composition, a word is introduced. The hierarchy of the circles determines the the placement of the letters; where the viewer's eye begins and where the last letter is read. For this exercise, the word "Across" was chosen.
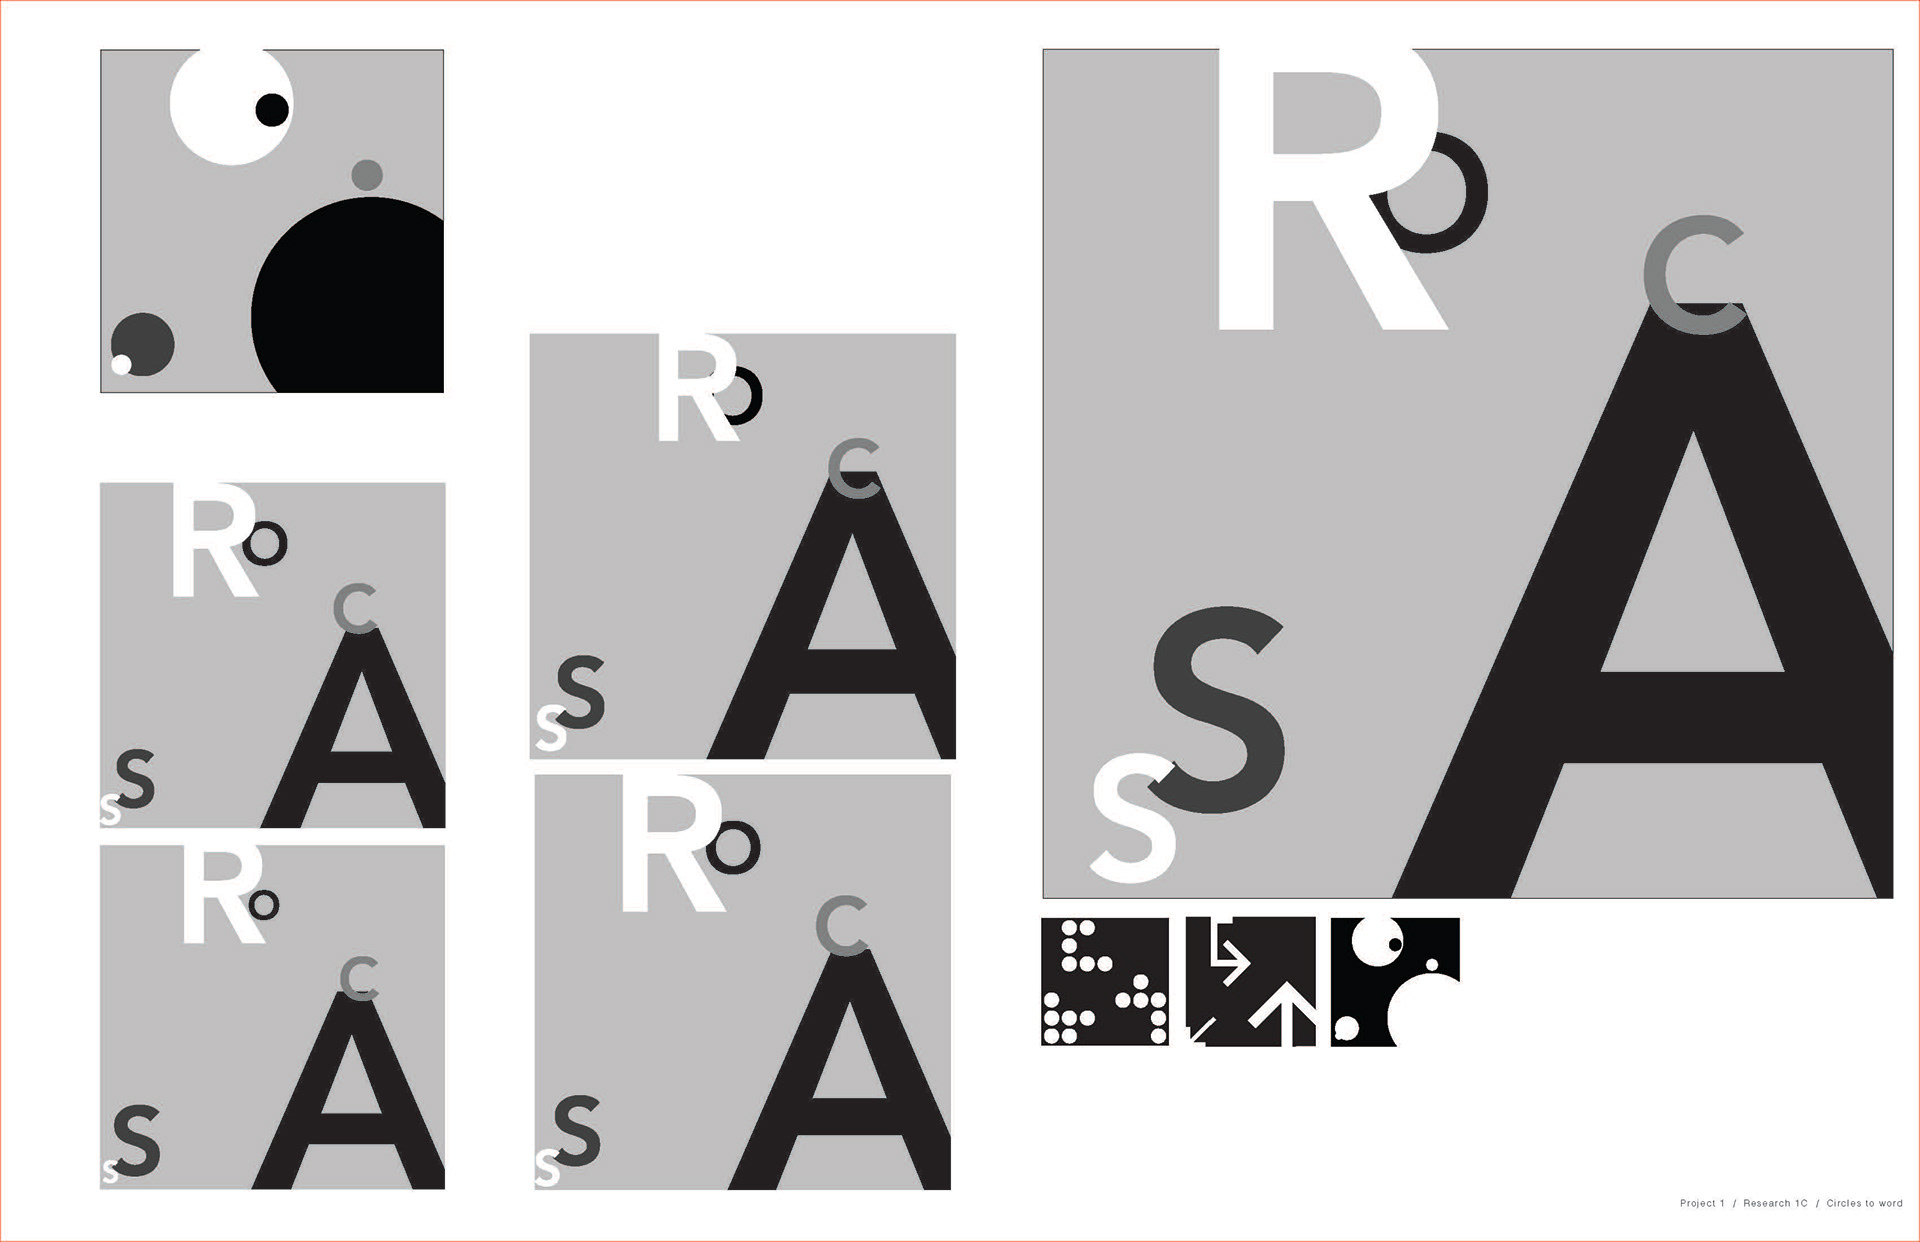

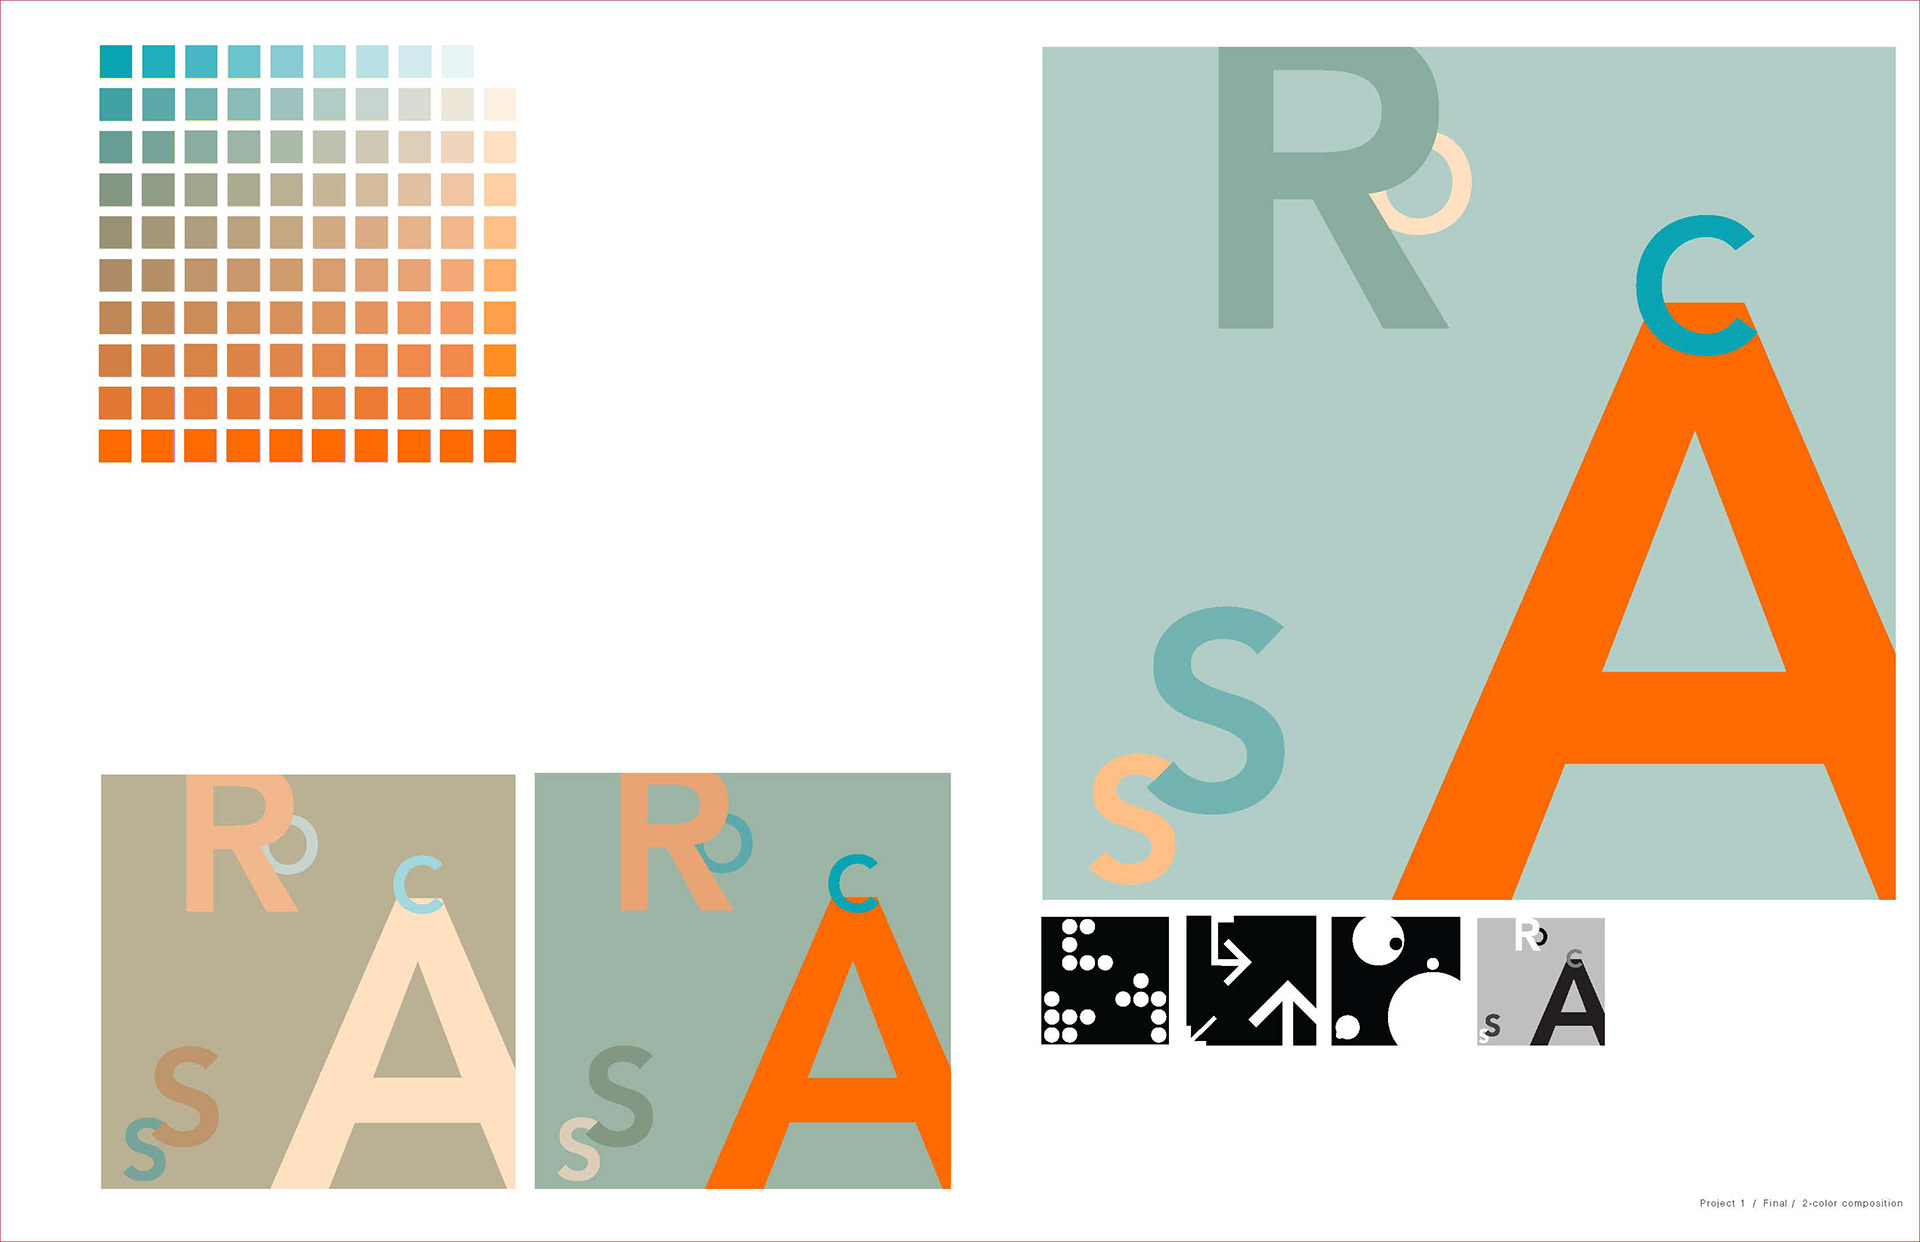
Using a combination of different grayscale compositions, the final one is settled and placed largely on the left page. The next step is to use two different contrasting colors. Utilizing the hierarchy in the established grayscale, different values of the contrasting colors are placed. The page on the right shows a variation of different combinations used to read the word "Across." Below is the final color combination as well as a compilation of the finals steps of this project from start to finish.